Prompt library
142 NotebookLM prompts that beat “summarize”
Every prompt here was shared by the community — collected from r/notebooklm threads and public roundups, credited and linked to where it came from. Each is labeled with where it goes: chat, the notebook's settings, or the Audio Overview and slides prompt boxes.
A NotebookLM prompt is copy-paste text that replaces a vague ask like “summarize this” with a specific job — cross-checking sources, building a study guide, drafting an Audio Overview script. Pick a category below, or jump straight to the full list.
Understand your sources
You uploaded documents and want real answers out of them — comparisons, contradictions, credibility, the things a plain "summarize" never surfaces.
- Deep analysisAsk harder questions of what you uploaded: compare sources, find contradictions, extract every quote on a topic, stress-test the main argument.24
- Setup & accuracyTemplates for the chat settings almost everyone leaves empty: a full setup scaffold, accuracy guardrails that label every claim, a verification footer, and quick one-line pins from the community.7
Study & teach
Turn the notebook into exam prep or a teaching aid — flashcards, quizzes, reading plans, and close study of specialist texts.
- Study & exam prepTurn sources into exam prep: flashcards, multiple-choice questions, study guides and reading plans with page references.27
- Islamic studiesFor studying uploaded Islamic texts — tafsir comparison, fiqh positions, hadith reports, glossaries. Answers only from your sources, never rulings.8
Make something from them
The notebook as a starting point for output: a podcast episode, a slide deck, an article draft.
- Audio OverviewsShape the podcast before you generate it: host roles, episode formats, lengths, languages and interview-style episodes.15
- Slides, video & infographicsStyle prompts for slides, infographics and video — pick a look, paste the prompt, generate.46
- Writing & contentTurn research into drafts: articles, summaries, content calendars and multi-platform posts, grounded in your sources.4
Decide & run processes
For work: decision memos, risk checks, and repeatable multi-step pipelines from raw sources to a finished deliverable.
All prompts
- The senior-researcher synthesis
A full academic-review harness: rules, process and a seven-part output structure. The most complete research prompt the community has shared.
Deep analysisChatShared by u/Dry-Writing-2811 on r/notebooklm
### ROLE You are acting as a senior academic researcher and expert analytical reviewer. Your reasoning must follow the standards of rigorous academic literature analysis. ### OBJECTIVE Produce a comprehensive analytical synthesis based exclusively on the provided sources. The synthesis must address the following research question or analytical theme. ### RESEARCH QUESTION """ [INSERT THE QUESTION OR ANALYTICAL THEME HERE] """ Your task is to extract, organize, and analyze all information contained in the sources that contributes directly or indirectly to answering this question. ### FUNDAMENTAL RULES Use only the information contained in the provided sources. Do not introduce any external knowledge. If information required to answer the question is not present in the sources, explicitly state: "Information not present in the sources." Preserve the technical terminology used in the original sources. Prioritize accuracy and fidelity to the authors' arguments. When multiple sources address the same issue, compare them explicitly. Avoid speculation or interpretation that is not grounded in the sources. ### ANALYTICAL PROCESS Before writing the synthesis: identify the main ideas of each source; extract key arguments, data, and methodologies; group related insights into thematic clusters relevant to the research question; identify agreements, disagreements, and methodological limitations across sources. ### REQUIRED STRUCTURE OF THE SYNTHESIS 1. QUESTION REFORMULATION - restate the research question and the analytical dimensions it implies. 2. CENTRAL THESIS OF THE CORPUS - the main idea emerging from the sources that best answers the question. 3. THEMATIC ANALYSIS - minimum 3 themes; for each: detailed explanation, key concepts, empirical findings, methodologies used, contribution to the question. 4. CONVERGENCES AND DIVERGENCES BETWEEN SOURCES - agreements, contradictions, differing interpretations, competing hypotheses. 5. NUANCE RADAR - conditional statements ("if", "however", "except"), methodological limitations, uncertainty zones, potential biases. 6. KEY CITATIONS (VERBATIM) - quote the most important statements verbatim, indicate the source, and explain why each matters. 7. FINAL SYNTHESIS - what is strongly supported, what remains debated, and the main implications.Open full pageHow to use it
- 1Open your notebook at notebooklm.google.com.
- 2Replace the [bracketed] parts with your specifics.
- 3Paste the prompt into the chat box and send it.
Square brackets mark the parts you replace with your own topic or question.
- The insight meta-prompt (v5.1)
Doesn't summarize - it red-teams your notes and designs five custom prompts to expose blind spots. The author runs it in Gemini with the notebook attached; it also works pasted into Gemini Notebook chat.
Deep analysisChatShared by u/palo888 on r/notebooklm
ROLE:
Elite [Meta-Prompt Architect + Insight Extraction Strategist + Red-Team Analyst + Decision Intelligence Designer].

CORE OBJECTIVE:
Your task is NOT to summarize the attached material. Your task is to: dissect the text deeply; map its explicit and implicit logic; identify blind spots, hidden tensions, untested assumptions, weak signals, and untapped insight potential; and ONLY THEN design 5 exceptionally high-quality metaprompts. These metaprompts must be engineered so that running them on this same material yields outputs that: expose non-obvious insights, shift interpretation, reveal hidden risks, and deliver hard decision advantages.

GUIDING PRINCIPLE:
No generic analytical prompts. Force the model to bypass surface-level conclusions, shatter false certainties, map 2nd and 3rd-order effects, and strictly separate fact from conjecture.

HARD RULES & QUALITY GUARDS:
- Truth > Originality (Crucial): Accuracy over flair. A precise, grounded prompt beats a bold, unverified one.
- Decision Delta: Every proposed prompt must drive an output that alters at least one of: reality interpretation, prioritization, resource allocation, execution sequence, or confidence level.
- Anti-Overlap Check: Minimize overlap among the 5 prompts. Their primary analytical vectors must be materially distinct, even if they partially touch adjacent issues.
- Evidence Threshold: No strong claims without >=2 independent notebook signals, unless explicitly tagged as [H] (Hypothesis).
- Density & Edge: Maximize intellectual payload, minimize word count. Zero fluff. Do not write a long prompt if a shorter one achieves the same effect.
- Anti-Hallucination & Fake Wisdom: Do not invent author intent or ungrounded mechanisms. Implicit-layer claims require extra caution. Do not infer motives, strategy, or latent structure unless supported by multiple notebook signals; otherwise mark them as [H].
- Fallback Mode: If the material is too chaotic, shallow, or incomplete for deep extraction, state this explicitly. Pivot to designing prompts that first fix thinking structures, refine questions, or expose critical missing data.

EPISTEMIC MAP (Mandatory output structure for every prompt):
[F] Fact from the notebook
[I] Inference drawn from multiple signals
[H] Hypothesis requiring testing
[M] Missing variable

ACTIONABILITY (Mandatory in every prompt):
- Differentiating Experiment: At least one cheap, reversible test that meaningfully discriminates between two or more competing explanations and would change the next decision if the result goes either way.
- Decision Impact: A dedicated section: "How does this insight alter a decision, priority, or resource allocation?"

EXECUTION PROTOCOL (Strictly execute STEPS 1, 2, and 3):

STEP 1: NOTEBOOK DIAGNOSIS (Output first)
- Material Type: What is this? (Strategy, research, operations...)
- Explicit vs. Implicit Layers: What is stated directly vs. assumed silently?
- Insight Potential: Where are the core tensions, anomalies, and missing variables?
- Dominant Failure Mode: How is a smart but busy user most likely to misinterpret this material?
- Analytical Risks: Other risks of superficial reading.
- Evidence Signals: Reference 2-5 specific notebook signals supporting your diagnosis. Do not fabricate formal citations if the material's structure does not support them.

STEP 2: 5 METAPROMPT GENERATION
Design 5 prompts primarily using these frameworks (adapt and explain if a framework doesn't fit the material):
THE SHADOW AUDIT: Exposes what the material omits, ignores, or inadvertently masks.
THE INVERSION ENGINE: Analyzes vulnerabilities - how the current state is guaranteed to fail.
THE SECOND-ORDER CATALYST: Maps non-intuitive downstream effects 2-3 steps ahead.
THE ASYMMETRIC LEVERAGE: Hunts for small intervention points with disproportionate impact.
THE PARADIGM DESTROYER: Hard red-team audit; how the smartest critic would dismantle this.

Structure for EACH of the 5 prompts:
- Name (Short, punchy).
- Primary Analytical Question (1 sentence proving anti-overlap).
- Why Standard Analysis Fails.
- When to Use & Expected Output.
- READY-TO-COPY PROMPT (In a markdown codeblock. Must contain: Role, objective, rules, [F/I/H/M] framework, differentiating experiment, and decision impact).
- Failure Risk / Blind Spots.

STEP 3: USAGE PROTOCOL (Output last)
- MVP Prompt: Identify the ONE prompt with the highest expected decision leverage for this material. Explain why to start there.
- Value Profile: Label each prompt: [Best for Reframing], [Best for Risk Detection], [Best for Fast Validation], [Best for Leverage], or [Best for Red Team].
- Combinatorics & Sequencing: Which 2 prompts stack best? Provide the exact sequence and what gap the second fills.
- Warning: Where is the user most likely to overvalue the insight and undervalue missing variables?

RESPONSE STYLE: Extremely concrete, dense, zero fluff, high signal-to-noise ratio, epistemically honest.
Open full pageHow to use it
- 1Open your notebook at notebooklm.google.com.
- 2Replace the [bracketed] parts with your specifics.
- 3Paste the prompt into the chat box and send it.
Square brackets mark the parts you replace with your own topic or question.
- Neural triangulation
Three lenses on the same question - analytical, creative, skeptical - to break confirmation bias before an important decision.
Deep analysisChatShared by u/ZoinMihailo on r/notebooklm
Ask the same question three times, through three different lenses:

Perspective 1 - Analytical lens: "Analyze this material as a strict academic researcher focused on evidence and logical consistency."

Perspective 2 - Creative lens: "Interpret the same material as a creative strategist looking for non-obvious connections and innovative applications."

Perspective 3 - Skeptical lens: "Question all conclusions as a critical reviewer looking for gaps and potential problems."

When all three lenses converge on the same conclusion, you are on solid ground.
Open full pageHow to use it
- 1Open your notebook at notebooklm.google.com.
- 2Replace the [bracketed] parts with your specifics.
- 3Paste the prompt into the chat box and send it.
Square brackets mark the parts you replace with your own topic or question.
- Reduce this topic to first principles
Strip every assumption, convention, and fashion away. Find the irreducible truths — then derive non-obvious conclusions from them.
Deep analysisChatShared by Sourclip
Strip the central topic of this notebook down to its first principles.

Step 1 — Inventory the assumptions.
List the 6–10 things the sources keep treating as given. State each in plain language.

Step 2 — Classify each assumption.
For every item, decide: is this a physical or logical necessity, a current convention, or a fashion that could change next year? Mark each as Necessity, Convention, or Fashion, and cite the source that reveals which.

Step 3 — Distill the irreducible truths.
After removing every Convention and Fashion, what remains? Write the 3–5 truths that survive, in numbered form, each defensible from first principles alone.

Step 4 — Reason forward.
Using only those first principles — not the conventions you removed — derive 3 non-obvious conclusions. Each conclusion should be something the sources don't quite state but that the principles strictly imply.

If a conclusion contradicts the dominant view in the sources, say so explicitly and explain why the conventions were hiding it.
Open full pageHow to use it
- 1Open your notebook at notebooklm.google.com.
- 2Replace the [bracketed] parts with your specifics.
- 3Paste the prompt into the chat box and send it.
Square brackets mark the parts you replace with your own topic or question.
- Stress-test the main argument
Identify the dominant argument across the sources, then attack it the way a hostile reviewer would.
Deep analysisChatShared by Sourclip
Identify the dominant argument across this notebook — the position the sources collectively push hardest — and then stress-test it.

Step 1 — State the dominant argument in one paragraph. Quote the two sources that articulate it most clearly.

Step 2 — Generate the 5 strongest objections to it. For each:
- A one-sentence statement of the objection.
- The intellectual tradition or kind of expert who would press it.
- The part of the notebook the objection would attack first.
- The single concrete piece of evidence that would make this objection devastating.

Step 3 — Identify the blind spots. What is the argument failing to consider that isn't quite an objection — adjacent risks, missing constituencies, second-order effects, fragile dependencies?

Step 4 — Verdict. After running the gauntlet, where does the argument hold and where does it crack? In 3–4 sentences, name the modified version of the argument that would actually survive scrutiny.

Be adversarial but fair. The goal is to find what's true, not to win.
Open full pageHow to use it
- 1Open your notebook at notebooklm.google.com.
- 2Replace the [bracketed] parts with your specifics.
- 3Paste the prompt into the chat box and send it.
Square brackets mark the parts you replace with your own topic or question.
- Simulate the questions an expert would ask
The clarifying, probing, and generative questions a world-class expert in this domain would actually press these sources with.
Deep analysisChatShared by Sourclip
Simulate the questions a world-class expert in this domain would ask after reading every source in this notebook.

Produce 15 questions, grouped as:
1. Five clarifying questions — things an expert would need answered before forming any opinion. These should expose ambiguity in the sources.
2. Five probing questions — questions that test whether the strongest claims actually hold up. These should target weak evidence, suspicious certainty, or missing context.
3. Five generative questions — questions that open the topic to new territory: what would change everything? what would the sources predict about adjacent problems they don't address?

For each question:
- Phrase it the way an expert would actually ask it — concrete, not abstract.
- Note which source(s) would be most relevant to the answer, or "Not addressed by current sources" if none.
- Add a one-sentence note on what a strong answer would unlock.

Avoid soft, polite, or beginner-friendly questions. These should be questions an author would lose sleep over.
Open full pageHow to use it
- 1Open your notebook at notebooklm.google.com.
- 2Replace the [bracketed] parts with your specifics.
- 3Paste the prompt into the chat box and send it.
Square brackets mark the parts you replace with your own topic or question.
- Compare arguments across sources
Get a side-by-side breakdown of the central argument in each source — and where they actually disagree.
Deep analysisChatShared by Sourclip
Compare the main arguments across every source in this notebook.

For each source, list:
- Its central thesis (one sentence).
- The two strongest pieces of evidence it cites.
- What it underweights, ignores, or assumes without justification.

Then produce a comparison table with three columns — "Agree", "Partially agree", "Disagree" — showing where the sources sit on the 4–6 most important sub-questions.
Open full pageHow to use it
- 1Open your notebook at notebooklm.google.com.
- 2Replace the [bracketed] parts with your specifics.
- 3Paste the prompt into the chat box and send it.
Square brackets mark the parts you replace with your own topic or question.
- Find recurring patterns across sources
Surface themes, structures, and behaviors that show up in source after source — even when nobody names them directly.
Deep analysisChatShared by Sourclip
Identify the recurring patterns across every source in this notebook — the things that keep showing up but that no single source explicitly names.

Look for:
- Repeated language or framing used to describe the same thing.
- Cause-and-effect chains that appear in multiple sources.
- Common roles, actors, or archetypes that recur.
- Repeated failure modes or success conditions.
- Implicit timelines or sequences that match across sources.

For each pattern:
- Give it a short, memorable name.
- List the 2–4 sources where it appears, with a short quote from each.
- Explain what the pattern suggests that no individual source quite spells out.

Skip anything that any single source already calls out by name. The whole point is to surface what only becomes visible across the set.
Open full pageHow to use it
- 1Open your notebook at notebooklm.google.com.
- 2Replace the [bracketed] parts with your specifics.
- 3Paste the prompt into the chat box and send it.
Square brackets mark the parts you replace with your own topic or question.
- Connect ideas across unrelated sources
Surfaces non-obvious bridges between sources that look unrelated on the surface. For synthesizers, writers and original thinkers.
Deep analysisChat - Reconstruct the timeline across all sources
Stitch scattered events from every source into one unified chronology — with disagreements and single-source claims flagged.
Deep analysisChatShared by Sourclip
Reconstruct a unified timeline of events from every source in this notebook.

Produce:
1. A single chronological list of every dated or datable event mentioned across sources. For each event: date (or approximate range), one-line description, and the source it came from.
2. Where two or more sources describe the same event, merge them into one entry and note any disagreements about date, sequence, or detail.
3. Flag any event that only one source reports — mark it [single-source].
4. Identify 2–3 inflection points: moments where the trajectory of the story clearly changes. Explain in one sentence why each is pivotal.
5. List any sequencing conflicts the sources never resolve, and the kind of evidence that would settle each one.

If a source describes events without dates, place them in the relative order suggested by the surrounding sources and mark them [estimated position]. Never invent dates that no source supports.
Open full pageHow to use it
- 1Open your notebook at notebooklm.google.com.
- 2Replace the [bracketed] parts with your specifics.
- 3Paste the prompt into the chat box and send it.
Square brackets mark the parts you replace with your own topic or question.
- Read the sources through four stakeholder lenses
How a founder, investor, customer, and competitor would each interpret the same notebook — side-by-side, with the gaps between them.
Deep analysisChatShared by Sourclip
Read this notebook through four different stakeholder lenses. For each, write a 5–8 sentence interpretation as if that stakeholder had just finished every source.

The four lenses:
1. Founder / operator — what does this change about what to build, ship, or stop?
2. Investor — what does this change about where capital should flow, and what risk to underwrite?
3. Customer / end-user — what does this change about expectations, price, or alternatives?
4. Competitor — what does this expose as a vulnerability or unclaimed wedge?

For each lens:
- Lead with the single biggest takeaway *that lens specifically* would extract.
- Quote one specific line from the sources that lens would highlight.
- Name the one thing that lens would actively dismiss or downweight from the notebook.

End with a one-paragraph synthesis: where do the four readings converge, and where do they pull in opposite directions? The disagreement between lenses is often more informative than the agreement.
Open full pageHow to use it
- 1Open your notebook at notebooklm.google.com.
- 2Replace the [bracketed] parts with your specifics.
- 3Paste the prompt into the chat box and send it.
Square brackets mark the parts you replace with your own topic or question.
- Where do two sources disagree?
Pins two sources against each other with specifics instead of a polite blended answer.
Deep analysisChatShared by the r/notebooklm community (via AI Tool Discovery's roundup)
Where do [Source A] and [Source B] agree, and where do they disagree? Give specific examples from each.
Open full pageHow to use it
- 1Open your notebook at notebooklm.google.com.
- 2Replace the [bracketed] parts with your specifics.
- 3Paste the prompt into the chat box and send it.
Square brackets mark the parts you replace with your own topic or question.
- Hidden assumptions audit
Surface the unstated beliefs every source is building on — and which ones wouldn't survive scrutiny.
Deep analysisChat - Rank source credibility and bias
Audit every source for recency, provenance, evidence type, and bias — and decide which to trust when they conflict.
Deep analysisChatShared by Sourclip
Audit every source in this notebook for credibility, bias, and evidence quality.

For each source, score and explain:
1. Recency — how current is the underlying information? (use the source's own dates)
2. Provenance — primary, secondary, or tertiary? Who funded, published, or stands to benefit?
3. Evidence type — data, expert opinion, anecdote, or speculation? Which dominates?
4. Bias direction — what would this source likely under-report or over-emphasize?
5. Internal consistency — does the source contradict itself anywhere?

Produce:
- A ranked list, most reliable to least, with a one-sentence verdict per source.
- A conflicts section: when two sources disagree, which should be trusted and why.
- A "trust ceiling" — the strongest claim the notebook can support given the weakest links in its source set.

Be specific. "Generally credible" is not an answer; cite the passage that earned or lost trust.
Open full pageHow to use it
- 1Open your notebook at notebooklm.google.com.
- 2Replace the [bracketed] parts with your specifics.
- 3Paste the prompt into the chat box and send it.
Square brackets mark the parts you replace with your own topic or question.
- Attack the weakest argument
A quick red-team pass on any document you are about to rely on.
Deep analysisChatShared by the r/notebooklm community (via AI Tool Discovery's roundup)
What is the weakest argument in this document and what evidence would be needed to strengthen it?
Open full pageHow to use it
- 1Open your notebook at notebooklm.google.com.
- 2Replace the [bracketed] parts with your specifics.
- 3Paste the prompt into the chat box and send it.
Square brackets mark the parts you replace with your own topic or question.
- What does this research not cover?
Finds the questions your material never answers - often the fastest way to spot what to read next.
Deep analysisChatShared by the r/notebooklm community (via AI Tool Discovery's roundup)
What questions or topics does this research not address that you would expect it to cover?
Open full pageHow to use it
- 1Open your notebook at notebooklm.google.com.
- 2Replace the [bracketed] parts with your specifics.
- 3Paste the prompt into the chat box and send it.
Square brackets mark the parts you replace with your own topic or question.
- Find the open questions worth researching
Identify what your sources gesture at but never actually answer — and how to close the gap.
Deep analysisChatShared by Sourclip
Identify the unanswered questions in this notebook — the things the sources gesture at but don't actually resolve.

For each open question:
- State the question clearly.
- Explain why it matters (what decisions or conclusions hinge on it).
- Summarize what the current sources do and don't say about it.
- Describe the kind of evidence, source, or experiment that would actually answer it.

Rank the questions by how much answering them would change the overall picture.
Open full pageHow to use it
- 1Open your notebook at notebooklm.google.com.
- 2Replace the [bracketed] parts with your specifics.
- 3Paste the prompt into the chat box and send it.
Square brackets mark the parts you replace with your own topic or question.
- Detect weak signals in the noise
Find the emerging trends and subtle patterns the sources mention in passing — the things that aren't loud yet but might be soon.
Deep analysisChatShared by Sourclip
Surface the weak signals across this notebook — the patterns, mentions, and shifts that are easy to miss because no source treats them as a headline.

For each weak signal:
1. Name it crisply in one short phrase.
2. List the 2–4 places it appears across sources, with a brief quote each.
3. Explain what's interesting about it: why is it under-discussed relative to its potential significance?
4. Estimate its trajectory — dying, plateauing, or accelerating — and cite the one observation from the sources that justifies your call.
5. Suggest the single most informative next data point that would confirm or kill the signal within the next 6 months.

Avoid anything any source treats as a primary topic. The whole point is to find the things mentioned in passing that may not stay quiet for long.
Open full pageHow to use it
- 1Open your notebook at notebooklm.google.com.
- 2Replace the [bracketed] parts with your specifics.
- 3Paste the prompt into the chat box and send it.
Square brackets mark the parts you replace with your own topic or question.
- Structured research brief
Turn a notebook of mixed sources into a tight, citable brief you can hand to a teammate.
Deep analysisChatShared by Sourclip
Build a structured research brief from the sources in this notebook.

Format the output as:
1. Topic & scope — in one sentence.
2. Key claims — list each claim with the source it comes from.
3. Areas of consensus — where sources agree.
4. Points of disagreement — where sources contradict or undercut each other.
5. Gaps — what is missing, under-evidenced, or out of date.

Use only what's in the notebook. If you infer anything, flag it as "[inference]" and explain why.
Open full pageHow to use it
- 1Open your notebook at notebooklm.google.com.
- 2Replace the [bracketed] parts with your specifics.
- 3Paste the prompt into the chat box and send it.
Square brackets mark the parts you replace with your own topic or question.
- Extract the surprising insights
Find the non-obvious, counter-intuitive findings hidden in long sources — with citations.
Deep analysisChatShared by Sourclip
Surface the 10 most surprising, counter-intuitive, or non-obvious insights in this notebook.

For each one:
- Quote the exact passage it came from.
- Name the source.
- Explain in one sentence why it's surprising compared to the conventional view.

Skip anything obvious. Skip anything that just restates the topic. Only include items a well-informed reader would actually pause on.
Open full pageHow to use it
- 1Open your notebook at notebooklm.google.com.
- 2Replace the [bracketed] parts with your specifics.
- 3Paste the prompt into the chat box and send it.
Square brackets mark the parts you replace with your own topic or question.
- Index the sources first
The opening move of the workflow u/Able_Orchid_3818 shared: index before you ask anything, especially on messy transcripts and overlapping PDFs.
Deep analysisChatShared by u/Able_Orchid_3818 on r/notebooklm
Index the sources in this notebook into their main topics. Output only the topic titles - no summaries, no descriptions.
Open full pageHow to use it
- 1Open your notebook at notebooklm.google.com.
- 2Replace the [bracketed] parts with your specifics.
- 3Paste the prompt into the chat box and send it.
Square brackets mark the parts you replace with your own topic or question.
- Explain each topic, one by one
From the same workflow: never say “summarize” - say “explain”, and go through the index one title at a time so every source gets mined.
Deep analysisChatShared by u/Able_Orchid_3818 on r/notebooklm
Explain [topic title from the index] in full, making sure to draw from ALL uploaded sources. Do not summarize - explain, building a comprehensive, logical structure.
Open full pageHow to use it
- 1Open your notebook at notebooklm.google.com.
- 2Replace the [bracketed] parts with your specifics.
- 3Paste the prompt into the chat box and send it.
Square brackets mark the parts you replace with your own topic or question.
- Find every quote on a topic
The extraction template from the community roundup - turns a document into an evidence list with page numbers.
Deep analysisChatShared by the r/notebooklm community (via AI Tool Discovery's roundup)
Find every quote in this document where the author discusses [specific topic]. List them with the page number and one sentence of context for each.
Open full pageHow to use it
- 1Open your notebook at notebooklm.google.com.
- 2Replace the [bracketed] parts with your specifics.
- 3Paste the prompt into the chat box and send it.
Square brackets mark the parts you replace with your own topic or question.
- The one-paragraph synthesis
Forces a real synthesis across everything in the notebook - useful as a closing move after deeper passes.
Deep analysisChatShared by the r/notebooklm community (via AI Tool Discovery's roundup)
If I had to write a one-paragraph summary combining the main insights from all sources, what would it say?
Open full pageHow to use it
- 1Open your notebook at notebooklm.google.com.
- 2Replace the [bracketed] parts with your specifics.
- 3Paste the prompt into the chat box and send it.
Square brackets mark the parts you replace with your own topic or question.
- The complete chat-settings template
NotebookLM's custom instructions take up to 10,000 characters, and almost everyone leaves them empty. This is a full scaffold — role, output rules, do/don't list, a worked example — you fill in once per notebook and every answer inherits.
Setup & accuracyChat settingsROLE You are [describe the expert this notebook needs: "a senior literature-review assistant", "a due-diligence analyst", "a patient tutor for a first-year student"]. Your reader is [who] and they will use your answers to [do what]. OUTPUT RULES - Default length: [short and scannable / thorough]. Lead with the answer, then the support. - Structure anything over two paragraphs with headers or numbered points. - Cite the source document and page for every factual claim, not just the paragraph. - Use the terminology of the sources; do not substitute synonyms for technical terms. DO - Quote exact wording when a definition, number, or commitment matters. - Point out when two of my sources disagree, and name both. - End answers that involve judgment with the single strongest counter-argument found in the sources. DON'T - Don't pad with restatements of my question or closing summaries. - Don't answer from general knowledge. If the sources don't cover it, the answer is "The sources don't cover this," plus what WOULD answer it. - Don't average conflicting sources into one smooth claim. EXAMPLE OF A GOOD ANSWER [Paste one answer you liked from any notebook — two or three sentences is enough. The model calibrates on it.]
Open full pageHow to use it
- 1Open your notebook and click Customize (chat settings) in the chat panel.
- 2Paste the prompt as the notebook's custom instructions and save.
- 3It now applies to every question you ask in this notebook.
Square brackets mark the parts you replace with your own topic or question.
- Grounding guardrails: supported, inferred, or absent
The accuracy block for high-stakes notebooks: every claim gets labelled as supported, inferred or absent from the sources, disagreements are shown instead of averaged, and "I don't know" becomes a first-class answer.
Setup & accuracyChat settingsAccuracy rules for every answer in this notebook: 1. Every factual claim carries one of three labels: - [S] — stated in a source. Cite document and page. - [I] — inferred by combining sources. Name the sources being combined. - Nothing in between: if a claim is neither, do not make it. 2. If the sources do not cover something I ask, say exactly: "Not covered by the sources." Then say what kind of source would cover it. Never fill the gap from general knowledge, even when you are confident. 3. When sources disagree, present each position with its attribution. Do not average them, do not pick a winner unless I ask, and do not present the majority view as settled. 4. Hedged claims in a source ("suggests", "may", "preliminary") stay hedged in your answer. Upgrading an author's "may" to your "is" counts as an error. 5. If my question contains a false premise about the sources, correct the premise before answering.Open full pageHow to use it
- 1Open your notebook and click Customize (chat settings) in the chat panel.
- 2Paste the prompt as the notebook's custom instructions and save.
- 3It now applies to every question you ask in this notebook.
Square brackets mark the parts you replace with your own topic or question.
- The verification footer
Adds a standing audit trail: every substantive answer ends with a compact footer counting which claims are sourced, which are inferred, and what to double-check — so skimming an answer still tells you how much to trust it.
Setup & accuracyChat settings - A legend for your source labels
If you use labels or naming conventions on sources ('[DRAFT]', '[2019 — dated]', '[opposing view]'), the notebook doesn't know what they mean until you tell it. This template turns your naming scheme into instructions the model actually follows.
Setup & accuracyChat settingsShared by idea: Saikat Basu (MakeUseOf)
My sources use a naming convention. Interpret it as follows: - Sources marked [PRIMARY] — original documents (contracts, papers, transcripts). Prefer these for every factual claim. - Sources marked [SECONDARY] — commentary and summaries. Use for context; when they conflict with a [PRIMARY] source, the primary wins and you say so. - Sources marked [DRAFT] or [INTERNAL] — unfinished thinking. Never quote these as established positions. - Sources marked [DATED — year] — accurate as of that year. Flag the age whenever you rely on one. - Sources marked [OPPOSING] — included to represent the other side. Attribute their claims explicitly ("the opposing brief argues…"), never as neutral fact. [Adjust the labels above to your own scheme, delete what you don't use, then add: rename your sources in the notebook to match.]Open full pageHow to use it
- 1Open your notebook and click Customize (chat settings) in the chat panel.
- 2Paste the prompt as the notebook's custom instructions and save.
- 3It now applies to every question you ask in this notebook.
Square brackets mark the parts you replace with your own topic or question.
- The citation-forcing pinned note
From u/Inside-techminds' source-structure workflow: pin this and every answer arrives pre-wired for verification.
Setup & accuracyChat settingsShared by u/Inside-techminds on r/notebooklm
When answering, always cite the specific page number and the source document name.
Open full pageHow to use it
- 1Open your notebook and click Customize (chat settings) in the chat panel.
- 2Paste the prompt as the notebook's custom instructions and save.
- 3It now applies to every question you ask in this notebook.
Square brackets mark the parts you replace with your own topic or question.
- The patience instruction
One line in the notebook's custom settings that reliably makes answers longer, deeper and more carefully reasoned.
Setup & accuracyChat settingsShared by u/Able_Orchid_3818 on r/notebooklm
Take your time researching. Dive deep, do not rush, and be patient in your analysis and reading.
Open full pageHow to use it
- 1Open your notebook and click Customize (chat settings) in the chat panel.
- 2Paste the prompt as the notebook's custom instructions and save.
- 3It now applies to every question you ask in this notebook.
Square brackets mark the parts you replace with your own topic or question.
- Turn the notebook into a prompt generator
Fill a notebook with prompt-engineering material first, then have it write prompts for any goal - and improve its own draft.
Setup & accuracyChatShared by u/Last-Army-3594 on r/notebooklm
Using the knowledge in this notebook, create a high-quality prompt for this goal: [INSERT WHAT YOU WANT TO DO]. Make it clear, structured, and effective. Adjust how strict or creative it should be based on the task.

Then: Improve this prompt. Make it more effective, less generic, and better structured.
Open full pageHow to use it
- 1Open your notebook at notebooklm.google.com.
- 2Replace the [bracketed] parts with your specifics.
- 3Paste the prompt into the chat box and send it.
Square brackets mark the parts you replace with your own topic or question.
- The 7-day study schedule
Tell it your deadline, daily hours, weak topics and when your brain works best — it builds a day-by-day plan that puts hard material in your high-energy slots, schedules the practice exam days before the deadline, and keeps the last day review-only.
Study & exam prepChatShared by Gencay (LearnAIWithMe)
--- MY CONTEXT (fill this in) ---

What I'm preparing for:
[e.g., "Thermodynamics final exam", "thesis defense"]

Exam or deadline date: [e.g., "April 28", "in 10 days"]

Days I have: [e.g., "7 days"]

Hours I can study per day:
[e.g., "2 hours on weekdays, 4 hours on weekends"]

My weakest topics: [list them]

My strongest topics (review lightly, don't waste time): [list them]

Energy pattern: [e.g., "I focus best in the morning", "I'm a night owl"]

--- BUILD THE SCHEDULE ---

Structure the plan day by day. For each day:
1. Date and time block (match my available hours above).
2. Topic for that session — pull from my weakest topics first, then from sources I've underutilized.
3. Specific action — which section to review, which flashcards to practice.
4. Expected outcome — what I should be able to do by the end of that session.

Rules:
- Put the hardest topics in my highest-energy slots.
- Schedule a practice exam 2-3 days before the deadline, not the day before.
- Schedule a teach-back session the day before the deadline.
- Build in one rest block every 3 days. Burnout kills retention.
- The last day before the deadline is review only, not new material.

End with a one-paragraph summary of what I will be able to do after completing the schedule.
Open full pageHow to use it
- 1Open your notebook at notebooklm.google.com.
- 2Replace the [bracketed] parts with your specifics.
- 3Paste the prompt into the chat box and send it.
Square brackets mark the parts you replace with your own topic or question.
- The high-yield cheat sheet
Everything compressed to one page of what exams actually reward: key definitions, formulas, dates, and the three or four ideas everything else depends on — each item cited.
Study & exam prepChatShared by Josh Dubowsky
Condense all of these sources into a single one-page cheat sheet of only the highest-yield material for my [subject] exam: key definitions, formulas, dates, and the three or four ideas everything else depends on. Cut anything a typical exam would not reward. Cite the source for each item.
Open full pageHow to use it
- 1Open your notebook at notebooklm.google.com.
- 2Replace the [bracketed] parts with your specifics.
- 3Paste the prompt into the chat box and send it.
Square brackets mark the parts you replace with your own topic or question.
- 30-minute study guide
A complete 30-minute study guide from your notebook: glossary, core concepts, worked examples and a self-test.
Study & exam prepChatShared by Sourclip
Turn this notebook into a 30-minute study guide.

Include, in order:
1. A one-paragraph "why this matters" intro.
2. A glossary of every important term used in the sources, with plain-English definitions.
3. The 8–12 core concepts, each with a one-line explanation and the source it comes from.
4. 5 worked examples drawn directly from the sources.
5. A 10-question self-test mixing recall, application, and reasoning. Put the answer key at the end.

Keep the tone direct. Assume the reader is smart but new to the material.
Open full pageHow to use it
- 1Open your notebook at notebooklm.google.com.
- 2Replace the [bracketed] parts with your specifics.
- 3Paste the prompt into the chat box and send it.
Square brackets mark the parts you replace with your own topic or question.
- Practice exam in your professor's style
You describe how your professor writes exams — question mix, favourite phrasings, emphasised topics, time pressure — and it generates a full practice paper in that exact style, with an answer key and flags on what to revise.
Study & exam prepChatShared by Gencay (LearnAIWithMe)
Generate a practice exam from my course materials, matching my professor's style.

--- MY PROFESSOR'S STYLE (fill this in) ---

Question types I expect:
[e.g., "60% calculation, 30% short answer, 10% derivations"]

Favorite phrasings my professor uses:
[e.g., "calculate", "derive", "explain why", "compare and contrast"]

Topics my professor emphasizes in lectures: [list them]

Topics in the textbook my professor barely covers: [list them]

Difficulty and time pressure:
[e.g., "2-hour exam, 20 questions, partial credit given"]

Special rules: [e.g., "open book", "formula sheet allowed"]

--- GENERATE THE EXAM ---

Now generate questions using new content from my textbook and notes.

Structure:
- Match the question type mix above.
- Use my professor's phrasings word-for-word where relevant.
- Weight the questions toward emphasized topics, not textbook-only topics.
- Answer key at the end with full explanations.
- Mark high-priority topics (the ones my professor emphasizes).
- Flag any topic that I should spend more time on based on difficulty and frequency.
Open full pageHow to use it
- 1Open your notebook at notebooklm.google.com.
- 2Replace the [bracketed] parts with your specifics.
- 3Paste the prompt into the chat box and send it.
Square brackets mark the parts you replace with your own topic or question.
- The oral examiner
A strict but fair examiner: one question at a time, grades each answer out of 5, tells you what a full-mark answer would have added, then asks a harder follow-up. It will not move on until you answer.
Study & exam prepChatShared by Josh Dubowsky
Act as a strict but fair oral examiner for my [subject] exam. Ask me one question at a time based only on these sources. After each answer, grade it out of 5, tell me what a full-mark answer would have added, and then ask a harder follow-up. Do not move on until I have answered. Begin.
Open full pageHow to use it
- 1Open your notebook at notebooklm.google.com.
- 2Replace the [bracketed] parts with your specifics.
- 3Paste the prompt into the chat box and send it.
Square brackets mark the parts you replace with your own topic or question.
- The past-paper predictor
Upload several past papers and it maps which topics and question types recur versus rotate, then predicts this year's eight most likely questions with model-answer outlines.
Study & exam prepChatShared by Josh Dubowsky
Here are several past exam papers for [subject]. Analyse which topics and question types come up most often and which rotate year to year. Then predict the eight most likely questions for this year's exam, and give me a model-answer outline for each, citing the sources.
Open full pageHow to use it
- 1Open your notebook at notebooklm.google.com.
- 2Replace the [bracketed] parts with your specifics.
- 3Paste the prompt into the chat box and send it.
Square brackets mark the parts you replace with your own topic or question.
- Exam essay practice with rubric marking
For essay-based exams. Writes a question in your exam's style, lets you answer under time pressure, then marks it against a rubric built from your sources — argument, evidence, coverage — instead of vague encouragement.
Study & exam prepChatI am practising for an essay-based exam on [subject]. Questions are typically [describe format: "discuss" essays / compare-and-contrast / case analysis], answered in about [minutes] minutes. 1. Write ONE exam question in that style, answerable entirely from my sources. Not a softball — the kind that separates a 2:1 from a first. 2. Before I write, tell me only: how many marks it would carry and how many distinct points a full answer needs. Nothing else — no plan, no hints. 3. Wait for my answer. 4. Mark it against a rubric you build from the sources: - Argument: is there a thesis, or just topic coverage? - Evidence: which claims cite source material, which are unsupported? Page-reference what I SHOULD have cited. - Coverage: which of the expected points did I hit, which did I miss, and where in the sources the missing ones live. - Precision: terms used wrongly or loosely. 5. Give a mark band, the single change that would most raise it, and then a model answer outline — outline, not full prose, so I rewrite it myself.
Open full pageHow to use it
- 1Open your notebook at notebooklm.google.com.
- 2Replace the [bracketed] parts with your specifics.
- 3Paste the prompt into the chat box and send it.
Square brackets mark the parts you replace with your own topic or question.
- The active-recall drill
One question at a time, easy to hard, and it will not show the answer until you commit to one — the forced-retrieval loop that actually builds memory, unlike rereading.
Study & exam prepChatShared by Josh Dubowsky
Quiz me on these sources for my [subject] exam. Ask me one question at a time, starting easy and getting harder. Do not give me the answer until I respond. After each of my answers, tell me if I am right, correct what I missed, and cite the source. Keep going until I say stop.
Open full pageHow to use it
- 1Open your notebook at notebooklm.google.com.
- 2Replace the [bracketed] parts with your specifics.
- 3Paste the prompt into the chat box and send it.
Square brackets mark the parts you replace with your own topic or question.
- Four-type exam flashcards
Not just definition cards: cause-effect, comparison tables and applied-scenario cards, weighted toward what your professor is likely to test — repeated material, bold terms, summary sections.
Study & exam prepChatShared by Gencay (LearnAIWithMe)
Turn the key content of my sources into flashcards for exam prep.

Mix these 4 card types (not just definitions):

1. Definition cards (5 cards):
   Front: term. Back: definition + one real-world example.

2. Cause-effect cards (8 cards):
   Front: "What happens when [X]?"
   Back: the effect + why it happens.

3. Comparison cards (6 cards):
   Front: "How is [A] different from [B]?"
   Back: 3 key differences in a table format.

4. Application cards (6 cards):
   Front: a real scenario or problem.
   Back: which concept from my source applies + how to solve it.

Focus on material my professor is most likely to test — anything repeated across sources, anything in bold in my textbook, anything that shows up in the summary sections.

Cite the source and page for each card.
Open full pageHow to use it
- 1Open your notebook at notebooklm.google.com.
- 2Replace the [bracketed] parts with your specifics.
- 3Paste the prompt into the chat box and send it.
Square brackets mark the parts you replace with your own topic or question.
- Worked-problem drill for maths-heavy subjects
For maths, physics, chemistry, economics — subjects you pass by solving, not by rereading. Generates problems in the style of your sources' examples and grades your attempt step by step, catching where the method went wrong, not just the final number.
Study & exam prepChatThis is a problem-solving subject. I need drill, not summaries. From the worked examples and exercises in my sources: 1. Write one problem in the same style and difficulty as [chapter/topic], but with different numbers and setup — not one copied from the sources. Say which worked example it is modelled on, with page reference. 2. Wait for my attempt. Do not show any solution yet. 3. When I answer: check my work STEP BY STEP against the method in the sources. Tell me the first step where I went wrong and what the source's method says at that point — do not just mark the final answer. 4. If I was right, make the next problem one notch harder. If I was wrong, make the next one isolate exactly the step I fumbled. 5. Every 5 problems, list which steps I keep getting wrong, citing the source sections I should reread. Never accept a correct final answer with wrong working as correct. The exam marks the method.
Open full pageHow to use it
- 1Open your notebook at notebooklm.google.com.
- 2Replace the [bracketed] parts with your specifics.
- 3Paste the prompt into the chat box and send it.
Square brackets mark the parts you replace with your own topic or question.
- Exact-wording definitions drill
Law, medicine, accounting — subjects where a paraphrased definition loses marks. Extracts every term your sources define, quotes the definition verbatim with its page, then drills you and diffs your answer against the source wording word by word.
Study & exam prepChatIn this subject, definitions must be reproduced precisely — paraphrase costs marks. Step 1 — Extract every formally defined term from my sources. For each: the term, the definition QUOTED VERBATIM (no paraphrase, no tidying), and the source with page reference. If two sources define the same term differently, show both and flag the difference. Step 2 — Tell me which 10 are most likely to be asked, judged by how much the sources build on them. Step 3 — Drill me: give me a term, wait for my definition, then show the exact source wording next to what I wrote and point out every meaningful difference — a dropped condition, a softened "must" to "should", a missing exception. Cosmetic word-order differences don't count; changed meaning does. Keep score across the session and finish with the list of terms I still get wrong.
Open full pageHow to use it
- 1Open your notebook at notebooklm.google.com.
- 2Replace the [bracketed] parts with your specifics.
- 3Paste the prompt into the chat box and send it.
Square brackets mark the parts you replace with your own topic or question.
- 15 flashcards with page numbers
The community's flashcard template: definitions, core concepts and cause-effect, with a page reference on every card.
Study & exam prepChatShared by the r/notebooklm community (via AI Tool Discovery's roundup)
Generate 15 flashcards from this document. Format each as Question: [question] / Answer: [answer]. Focus on key definitions, core concepts, and cause-effect relationships. Keep each answer under two sentences and include the page number.
Open full pageHow to use it
- 1Open your notebook at notebooklm.google.com.
- 2Replace the [bracketed] parts with your specifics.
- 3Paste the prompt into the chat box and send it.
Square brackets mark the parts you replace with your own topic or question.
- 10 exam-difficulty multiple choice
Plausible wrong answers are what make practice questions work - this template demands them.
Study & exam prepChatShared by the r/notebooklm community (via AI Tool Discovery's roundup)
Write 10 multiple-choice questions from this material at undergraduate exam difficulty. Include one correct answer and three plausible wrong answers. Add the correct answer and page reference below each question.
Open full pageHow to use it
- 1Open your notebook at notebooklm.google.com.
- 2Replace the [bracketed] parts with your specifics.
- 3Paste the prompt into the chat box and send it.
Square brackets mark the parts you replace with your own topic or question.
- Explain this topic at four levels
A layered Feynman-style explanation — from a 12-year-old's analogy up to expert-level nuance.
Study & exam prepChatShared by Sourclip
Explain the central topic of this notebook at four escalating levels, using only what the sources support.

Level 1 — To a curious 12-year-old.
Use a single concrete analogy. 4–6 sentences. No jargon. Get the core intuition across.

Level 2 — To a smart non-expert.
Introduce the 3–4 most important terms with plain-English definitions. Explain why the topic exists and what problem it solves. 1–2 short paragraphs.

Level 3 — To a working professional in an adjacent field.
Add the mechanisms, the trade-offs, and the 2–3 most important debates inside the field. Cite sources. Around 250 words.

Level 4 — To a domain expert.
Surface the open questions, the strongest counter-arguments, and where the sources disagree. Be specific about evidence quality. Cite sources. 250–350 words.

Each level should feel like a complete explanation on its own — not a teaser for the next one.
Open full pageHow to use it
- 1Open your notebook at notebooklm.google.com.
- 2Replace the [bracketed] parts with your specifics.
- 3Paste the prompt into the chat box and send it.
Square brackets mark the parts you replace with your own topic or question.
- Build a mental models map of this topic
Convert dense sources into the first principles, models, and analogies that let you reason about the topic from scratch.
Study & exam prepChatShared by Sourclip
Build a mental models map of this topic using only the sources in this notebook.

Produce:
1. First principles — the 4–6 most fundamental truths the entire topic rests on. State each in plain language and cite the source.
2. Core mental models — 5 models or frameworks the sources use, named or unnamed. For each: a one-line definition, what it lets you predict, and an example pulled from the notebook.
3. Analogies — 3 strong analogies (drawn from the sources or constructed from them) that make the topic feel intuitive to someone new. For each, note where the analogy breaks down.
4. Cause-and-effect chains — 2–3 "if X, then Y, then Z" sequences the sources support, with the relevant citation at each link.
5. A diagram-in-words — a flat-text outline showing how the models, principles, and chains connect.

The goal: someone reading only this output should be able to reason about the topic without re-reading the sources.
Open full pageHow to use it
- 1Open your notebook at notebooklm.google.com.
- 2Replace the [bracketed] parts with your specifics.
- 3Paste the prompt into the chat box and send it.
Square brackets mark the parts you replace with your own topic or question.
- The three things to understand first
Sequencing help for dense papers: what must click before the rest can.
Study & exam prepChatShared by the r/notebooklm community (via AI Tool Discovery's roundup)
What are the three things I absolutely need to understand from this document before I can follow the rest? Explain each one clearly, with the page reference where it appears.
Open full pageHow to use it
- 1Open your notebook at notebooklm.google.com.
- 2Replace the [bracketed] parts with your specifics.
- 3Paste the prompt into the chat box and send it.
Square brackets mark the parts you replace with your own topic or question.
- Explain it to a non-specialist
The main argument, translated - with concrete examples pinned to the sections they come from.
Study & exam prepChatShared by the r/notebooklm community (via AI Tool Discovery's roundup)
Explain the main argument of this paper as if I have basic knowledge of the field but am not a specialist. Use concrete examples from the source to illustrate each key concept. Note the section where each example appears.
Open full pageHow to use it
- 1Open your notebook at notebooklm.google.com.
- 2Replace the [bracketed] parts with your specifics.
- 3Paste the prompt into the chat box and send it.
Square brackets mark the parts you replace with your own topic or question.
- The cross-topic connector
Exam questions combine topics for the harder marks. This shows how two topics connect across your sources and gives three linking questions with an approach for each.
Study & exam prepChatShared by Josh Dubowsky
Show me how [topic A] connects to [topic B] across these sources. Exam questions often combine topics for the harder marks. Give me three questions that link the two, and a short approach for answering each.
Open full pageHow to use it
- 1Open your notebook at notebooklm.google.com.
- 2Replace the [bracketed] parts with your specifics.
- 3Paste the prompt into the chat box and send it.
Square brackets mark the parts you replace with your own topic or question.
- The newcomer FAQ
Turns dense material into the eight questions a beginner would actually ask.
Study & exam prepChatShared by the r/notebooklm community (via AI Tool Discovery's roundup)
Read this document and write a FAQ covering the 8 questions a newcomer to this topic would most likely have. Answer each question in 2-3 sentences using only information from the source. Use conversational language, not academic tone.
Open full pageHow to use it
- 1Open your notebook at notebooklm.google.com.
- 2Replace the [bracketed] parts with your specifics.
- 3Paste the prompt into the chat box and send it.
Square brackets mark the parts you replace with your own topic or question.
- Build an FAQ from the sources
Turn dense sources into a tiered FAQ that newcomers actually understand.
Study & exam prepChatShared by Sourclip
Generate a comprehensive FAQ from this notebook.

Anticipate the 15 questions a smart newcomer would actually ask after skimming these sources. Group them as:
- Beginner (5)
- Intermediate (5)
- Advanced (5)

For each question:
- Answer in 2–4 sentences, grounded entirely in the notebook.
- Cite the source the answer is drawn from.
- If the sources don't cover the question, say "Not covered in current sources" instead of guessing.
Open full pageHow to use it
- 1Open your notebook at notebooklm.google.com.
- 2Replace the [bracketed] parts with your specifics.
- 3Paste the prompt into the chat box and send it.
Square brackets mark the parts you replace with your own topic or question.
- Explain this topic through a completely different field
Borrow the structure of biology, music, military strategy, or another unrelated domain — and use it to reveal what the sources don't.
Study & exam prepChatShared by Sourclip
Explain the central topic of this notebook by borrowing structure from a completely different field.

Produce three full analogies, each from a different domain. Suggested domains (not exhaustive): biology, music composition, military strategy, plumbing, language acquisition, ecology, weather systems, kitchens, civil engineering, chess openings.

For each analogy:
1. Name the source domain and why it's structurally similar to the notebook's topic.
2. Map the 4–6 most important elements one-to-one (Topic concept ↔ Domain concept), with the source that justifies each mapping.
3. Walk through one specific example from the source domain and show what it reveals about how the notebook's topic actually behaves.
4. Identify exactly where the analogy breaks — every analogy has a limit, and naming it is part of the deal.
5. State the one insight about the original topic that becomes obvious only through this analogy.

Rank the three analogies from most clarifying to least, and explain in 2–3 sentences why the winner won.
Open full pageHow to use it
- 1Open your notebook at notebooklm.google.com.
- 2Replace the [bracketed] parts with your specifics.
- 3Paste the prompt into the chat box and send it.
Square brackets mark the parts you replace with your own topic or question.
- Weakness detection from your own notes
Reads your notes against the sources and ranks your five weakest topics with evidence — sparse coverage, vague statements, skipped prerequisites — plus what to review first and a self-check question for each.
Study & exam prepChatShared by Gencay (LearnAIWithMe)
--- MY CONTEXT (fill this in) ---

Subject I'm studying: [e.g., "Thermodynamics"]

What I'm preparing for: [e.g., "final exam", "general mastery"]

Topics I already know well (skip these): [list them]

My available time: [e.g., "5 hours this week"]

--- WEAKNESS SIGNALS TO USE ---

Use these signals from my notes to judge weakness:

1. Topics my notes barely cover compared to the source.
2. Topics where my notes have errors, vague statements, or question marks.
3. Topics that appear often in the source but I only wrote one or two lines about.
4. Topics connected to concepts I skipped — if I don't understand the prerequisite, I probably don't understand what builds on it.
5. Topics with specific techniques, formulas, or examples — these are the most common weak points when notes are sparse.

For each of the 5 weakest topics, give me:

- Topic name and where it lives in my sources.
- Why I'm probably weak there — based on specific evidence from my notes.
- What to review first — the single chapter, section, or concept to start with.
- How much time to spend — 30 min, 1 hour, 2 hours.
- A quick self-check question to know when I've actually learned it.

Rank from most weakness to least. Focus on what will hurt my grade most, not what's easiest to catch up on.
Open full pageHow to use it
- 1Open your notebook at notebooklm.google.com.
- 2Replace the [bracketed] parts with your specifics.
- 3Paste the prompt into the chat box and send it.
Square brackets mark the parts you replace with your own topic or question.
- Find what your lecture notes missed
Upload your own notes next to the textbook chapter or slides, and it diffs them: what you captured wrong, what you missed entirely, and what you wrote that the sources do not support. Your notes stop being a private island of errors.
Study & exam prepChatIn this notebook: my own lecture notes ([name the source]) and the reference material they should match ([textbook chapter / slides]). Compare them: 1. WRONG — statements in my notes the reference contradicts. Quote my version and the source's version side by side, with page reference. This section matters most; be blunt. 2. MISSING — things the reference treats as important (definitions, conditions, exceptions, worked examples) that my notes skip entirely. Rank by likely exam weight, not by order of appearance. 3. UNSUPPORTED — things in my notes that appear nowhere in the reference. Flag each as either "probably from the lecture itself — verify with classmates" or "possibly a misunderstanding". 4. FINE — one line confirming which parts of my notes check out, so I know what NOT to redo. Then give me the 20-minute patch: the shortest reading list, with pages, that fixes sections 1 and 2.
Open full pageHow to use it
- 1Open your notebook at notebooklm.google.com.
- 2Replace the [bracketed] parts with your specifics.
- 3Paste the prompt into the chat box and send it.
Square brackets mark the parts you replace with your own topic or question.
- Your personal tutor persona
Goes in the notebook's chat settings, not the chat: a tutor with the personality and teaching style you choose, who answers from your sources and always asks one follow-up to check you actually understood.
Study & exam prepChat settingsShared by Gencay (LearnAIWithMe)
Act like [TEACHER NAME] — my [DESCRIPTION].

[TEACHER NAME] is:
- [PERSONALITY TRAIT 1, e.g., "patient when I don't understand"]
- [PERSONALITY TRAIT 2, e.g., "excited about the subject"]
- [PERSONALITY TRAIT 3, e.g., "always uses real-world examples"]
- [PERSONALITY TRAIT 4, e.g., "never makes me feel stupid for asking"]

How [TEACHER NAME] teaches:
- Explains visually when possible.
- Asks me questions back instead of just giving answers.
- Uses analogies from [FIELD OR INTEREST, e.g., "cooking", "sports", "everyday life"].
- Connects new ideas to things I already know.
- Tells me when I'm getting off track and gently pulls me back.

When I ask a question, [TEACHER NAME] does not just answer. [TEACHER NAME] also asks me one follow-up question to check if I actually understood.

Stay in character for our entire conversation. Use my sources to answer, but speak in [TEACHER NAME]'s voice.
Open full pageHow to use it
- 1Open your notebook and click Customize (chat settings) in the chat panel.
- 2Paste the prompt as the notebook's custom instructions and save.
- 3It now applies to every question you ask in this notebook.
Square brackets mark the parts you replace with your own topic or question.
- The Feynman teach-back
Roles flipped: you teach, it plays the student you choose — curious beginner or skeptical professor — asks three escalating questions, corrects you against the sources and scores your understanding out of 10.
Study & exam prepChatShared by Gencay (LearnAIWithMe)
Flip our roles. You are the student. I am the teacher.

--- MY CONTEXT (fill this in) ---

Topic I'm teaching you: [name it]

My level (so you know how to push back):
[e.g., "undergraduate", "master's student", "self-taught"]

How hard I want you to be:
[e.g., "curious beginner", "sharp student who asks follow-ups", "skeptical professor who tests every claim"]

--- HOW THIS WORKS ---

1. I will explain the topic to you in my own words. Do not interrupt my first explanation.

2. After I finish, play the student I described above. Ask me 3 questions:
   - One basic question about something I might have skipped or oversimplified.
   - One follow-up that tests whether I understand why the concept works, not just what it is.
   - One hard question that probes an edge case or connection to other concepts in my sources.

3. Use only what's in my sources to generate your questions. If I say something that contradicts my sources, point it out.

4. After I answer each question, tell me: whether my answer is correct, what I missed, and which part of my sources I should revisit.

5. At the end, score my understanding from 1 to 10 and tell me what to study next.

Ready? I'll start teaching when I type "Here's my explanation:"
Open full pageHow to use it
- 1Open your notebook at notebooklm.google.com.
- 2Replace the [bracketed] parts with your specifics.
- 3Paste the prompt into the chat box and send it.
Square brackets mark the parts you replace with your own topic or question.
- The per-chapter reading questions
u/daozenxt reads books chapter-by-chapter with Gemini Notebook in a side panel, asking these four questions per chapter.
Study & exam prepChatShared by u/daozenxt on r/notebooklm
Per chapter, ask:

"What is this chapter really trying to teach?"
"What's the framework/model here?"
"What would be a counterexample?"
"Summarize into 5 bullets + a simple mental model."
Open full pageHow to use it
- 1Open your notebook at notebooklm.google.com.
- 2Replace the [bracketed] parts with your specifics.
- 3Paste the prompt into the chat box and send it.
Square brackets mark the parts you replace with your own topic or question.
- The end-of-book big picture
The closing questions of the same book workflow - connection, weak spots, and a teachable artifact.
Study & exam prepChatShared by u/daozenxt on r/notebooklm
At the end of the book, ask:

"How do these chapters connect?"
"What are the book's core claims and where are the weak spots?"
"Turn this book into a 30-min workshop outline."
Open full pageHow to use it
- 1Open your notebook at notebooklm.google.com.
- 2Replace the [bracketed] parts with your specifics.
- 3Paste the prompt into the chat box and send it.
Square brackets mark the parts you replace with your own topic or question.
- Compare what your tafsir works say on one ayah
Upload two or more tafsir works and this lays their treatments of a single ayah side by side — what each emphasises, where they diverge, and what each cites. The comparison you would build by hand with the books open, done in one pass with the references kept.
Islamic studiesChatI am studying [surah and ayah number]. Using only the tafsir works I have uploaded, set out how each one treats it. For each work, in its own section: - The interpretation it gives, in its own emphasis rather than a flattened summary - The linguistic points it raises about specific words, with the Arabic term and its transliteration - What it cites in support — narrations, other ayat, named authorities — exactly as the work presents them - Anything it explicitly leaves open or lists as a disputed reading Then, across the works: 1. Where do they agree, and where do they genuinely differ rather than merely differ in wording? 2. What does the difference turn on — a linguistic reading, a narration one work accepts and another does not, a methodological difference? Cite the work and location for every point. Where my uploaded works do not address something, say so plainly instead of supplying it from elsewhere.
Open full pageHow to use it
- 1Open your notebook at notebooklm.google.com.
- 2Replace the [bracketed] parts with your specifics.
- 3Paste the prompt into the chat box and send it.
Square brackets mark the parts you replace with your own topic or question.
- Map the positions across madhahib in your sources
For a fiqh question covered by the manuals you have uploaded. It lays out which position each source attributes to which school and the evidence each gives, keeping the attributions the source made rather than inventing a consensus.
Islamic studiesChatQuestion under study: [state the fiqh question]. Using only the fiqh works I have uploaded, produce a comparison table with one row per position: | Position | School(s) the source attributes it to | Evidence the source cites | Which of my sources states this | Then, below the table: 1. On what point do the positions actually diverge — a difference over a text, over its authenticity, or over how a principle applies? 2. Which positions do my sources describe as the majority or the well-known view, and which as minority or weak? Use only the characterisations my sources themselves give. 3. What conditions or exceptions do the sources attach that a short summary would lose? Rules I need you to keep: - Attribute every position to the source that reports it. Do not merge sources into one voice. - Do not issue a ruling, prefer one position, or advise me what to do. Present what the sources say. - Where my sources conflict about what a school holds, show the conflict rather than resolving it.
Open full pageHow to use it
- 1Open your notebook at notebooklm.google.com.
- 2Replace the [bracketed] parts with your specifics.
- 3Paste the prompt into the chat box and send it.
Square brackets mark the parts you replace with your own topic or question.
- Pin down a term exactly as your text uses it
Technical vocabulary in aqeedah carries weight, and the same word can be used differently by different authors. This extracts the precise sense a specific uploaded text gives a term, and flags where your other sources use it differently.
Islamic studiesChatTerm under study: [Arabic term, with transliteration if you have it]. From my uploaded sources only: 1. How does each source define this term? Quote the defining passage and give its location. 2. What does each source contrast it with — the terms it is defined against are often more revealing than the definition. 3. Where do my sources use the term in different senses? Show the difference rather than reconciling it. 4. Which of my sources treat this term as contested, and what is the contest about? Give the Arabic alongside the transliteration throughout. If a source uses the term without defining it, say so — that is worth knowing.
Open full pageHow to use it
- 1Open your notebook at notebooklm.google.com.
- 2Replace the [bracketed] parts with your specifics.
- 3Paste the prompt into the chat box and send it.
Square brackets mark the parts you replace with your own topic or question.
- Extract what your sources report about a hadith
Pulls together the chain, the grading and the commentary that your uploaded collections and commentaries give for one narration. It reports what the books say — it does not grade anything itself, which is not a thing an AI has standing to do.
Islamic studiesChatNarration under study: [text or first words of the hadith]. From my uploaded collections and commentaries only, gather: 1. Where each of my sources records it — collection, book, chapter and number as the source gives them. 2. The chain of transmission exactly as each source prints it, without normalising the names. 3. Any grading my sources state, with the name of whoever gave that grading, quoted rather than paraphrased. 4. The commentary each source offers on its meaning. 5. Any variant wordings my sources note, and what turns on the variation. Important: report only what the sources state. Do not assess the chain, do not assign a grading of your own, and do not infer a grading from silence. Where my sources give no grading, say that no grading is stated.
Open full pageHow to use it
- 1Open your notebook at notebooklm.google.com.
- 2Replace the [bracketed] parts with your specifics.
- 3Paste the prompt into the chat box and send it.
Square brackets mark the parts you replace with your own topic or question.
- Reconstruct a chronology from your histories
Builds a dated sequence from the historical works you have uploaded, keeping the disagreements visible. Historians differ on dates and on what happened; a timeline that hides that is worse than no timeline.
Islamic studiesChatPeriod or events under study: [state the period, campaign, or figure]. From my uploaded historical sources only, build a chronology: - One entry per event, with the date in Hijri and Gregorian where my sources give both - What happened, in one or two sentences - Which of my sources reports it - Where my sources give different dates or different accounts, list both and attribute each After the chronology: 1. Which events do all my sources agree on? 2. Where do they disagree, and does the disagreement look like a difference of dating, of interpretation, or of which report an author accepted? 3. What gaps are there that my sources simply do not cover? Do not fill gaps from general knowledge. An honest gap is more useful to me than a smooth narrative.
Open full pageHow to use it
- 1Open your notebook at notebooklm.google.com.
- 2Replace the [bracketed] parts with your specifics.
- 3Paste the prompt into the chat box and send it.
Square brackets mark the parts you replace with your own topic or question.
- Build a glossary of the Arabic terms in your text
For working through a text in translation or a mixed-language syllabus. Produces a study glossary of the technical vocabulary as that particular text uses it, which is usually the thing that makes a difficult work suddenly readable.
Islamic studiesChatFrom my uploaded sources, build a glossary of the technical Arabic terms they use. For each term: - Arabic script - Transliteration - The sense it carries in this text specifically, not a general dictionary sense - The passage where it is first used or defined, with location - Related terms it should be studied alongside, and terms it is easily confused with Order the glossary by how central the term is to the argument of the text, not alphabetically — I want to know which twenty terms to learn first. Mark any term my sources use inconsistently.
Open full pageHow to use it
- 1Open your notebook at notebooklm.google.com.
- 2Replace the [bracketed] parts with your specifics.
- 3Paste the prompt into the chat box and send it.
Square brackets mark the parts you replace with your own topic or question.
- Turn a text into a teaching sequence
For teachers. Takes an uploaded work or syllabus and proposes a session-by-session sequence, with the passage each session covers and the questions likely to come up — the planning pass, kept anchored to the actual text.
Islamic studiesChatI am teaching [subject] from the sources I have uploaded, to [describe the students and their level], over [number] sessions. Propose a teaching sequence. For each session: - The passages it covers, cited by location - The two or three points a student must leave with - The prerequisite each point rests on, so I can see if my ordering is wrong - Two questions students at this level commonly find difficult here, and where in the text the answer lies - One short exercise drawn from the text itself Then tell me: 1. Which sessions carry too much and should be split 2. What the sequence assumes students already know that my sources do not teach Build only from the uploaded material. If a topic in my syllabus is not covered by these sources, list it separately as a gap rather than filling it in.
Open full pageHow to use it
- 1Open your notebook at notebooklm.google.com.
- 2Replace the [bracketed] parts with your specifics.
- 3Paste the prompt into the chat box and send it.
Square brackets mark the parts you replace with your own topic or question.
- Generate exam questions anchored to the text
Question sets where every answer is locatable in the uploaded material, with the reference attached. Useful for setting assessments and for students checking whether they have actually read closely.
Islamic studiesChatFrom my uploaded sources, write [number] exam questions on [topic or chapters]. Mix the types: - Recall: a definition or attribution stated plainly in the text - Comprehension: something the text explains but does not summarise - Analysis: something that requires holding two passages together For each question give: - The question - The expected answer, in the level of detail a good student should produce - The exact passage the answer comes from, with location - One wrong answer students plausibly give, and the misreading that produces it Every answer must be findable in the uploaded sources. Do not write a question whose answer depends on material I have not given you.
Open full pageHow to use it
- 1Open your notebook at notebooklm.google.com.
- 2Replace the [bracketed] parts with your specifics.
- 3Paste the prompt into the chat box and send it.
Square brackets mark the parts you replace with your own topic or question.
- Give the hosts opposing jobs
The single biggest upgrade to the default podcast: one host explains, the other is paid to disagree. Adversarial roles produce actual discussion instead of the "so true" rhythm — and the Challenger tends to find the real weaknesses in your material.
Audio OverviewsAudio OverviewHost A is 'The Expert' who explains the material. Host B is 'The Challenger' who pushes back: question the methodology, point out gaps in logic, play devil's advocate. Do not agree just to be agreeable.
Open full pageHow to use it
- 1In the Studio panel, choose Audio Overview and click Customize.
- 2Paste the prompt into the customization box.
- 3Generate — the hosts will follow your instructions.
Square brackets mark the parts you replace with your own topic or question.
- The two-voice quiz episode
A 15–20 minute professor-and-student quiz show from your sources: the student deliberately gets 3 of 10 wrong, corrections come with exact quotes, and the episode ends with a score and the most instructive mistakes.
Audio OverviewsAudio OverviewShared by Pasquale Pillitteri
Generate a Deep Dive in two-voice quiz format with a duration of 15-20 minutes, based exclusively on the uploaded sources.

Structure:
- Host A is the "professor": knows the material thoroughly and asks the questions.
- Host B is the "student": prepares answers but deliberately gets 3 out of 10 answers wrong.
- When the student is wrong, the professor gently corrects with the correct answer AND with the exact quotation from the source.
- When the student answers well, the professor digs deeper with a follow-up question.

Question composition:
- 4 multiple-choice questions (3 options each).
- 4 true/false questions with mandatory justification of the answer.
- 2 open-ended final synthesis questions.
- Progressive difficulty: from factual recall to conceptual connection.

Opening format: the two hosts introduce themselves, state the topic, indicate the total number of questions.
Closing format: final score for the student (e.g. 7/10), recap of the 3 most instructive errors, a reflection question left for the listener.
Tone: friendly, fast pace, never patronizing. Language: English.
Open full pageHow to use it
- 1In the Studio panel, choose Audio Overview and click Customize.
- 2Paste the prompt into the customization box.
- 3Generate — the hosts will follow your instructions.
Square brackets mark the parts you replace with your own topic or question.
- Define the listener, not the topic
"Make it simple" produces condescension; a concrete listener produces calibration. Swap in whoever you need: a CEO with four minutes, a skeptical engineer, a hiring committee.
Audio OverviewsAudio OverviewThe listener is a first-year student who has never seen this material and is nervous about it. No jargon without an immediate plain-language explanation. Assume good intelligence and zero background.
Open full pageHow to use it
- 1In the Studio panel, choose Audio Overview and click Customize.
- 2Paste the prompt into the customization box.
- 3Generate — the hosts will follow your instructions.
Square brackets mark the parts you replace with your own topic or question.
- The teach-a-newcomer episode
Hosts explain everything as if teaching a smart 12-year-old — an analogy for every complex term, abstract ideas grounded in physical examples, and the emphasis on why it matters over what it is.
Audio OverviewsAudio OverviewShared by Mahnoor Faisal (MakeUseOf)
Explain the core concepts in this source as if you are teaching a smart 12-year-old. Use analogies for every complex term. If there is a concept that is abstract, ground it in a real-world physical example. Focus on why this matters, not just what it is.
Open full pageHow to use it
- 1In the Studio panel, choose Audio Overview and click Customize.
- 2Paste the prompt into the customization box.
- 3Generate — the hosts will follow your instructions.
Square brackets mark the parts you replace with your own topic or question.
- Script a narrative arc
Without an arc the hosts wander through your sources in file order. With one, the episode has a beginning, a reveal and a takeaway — the difference between information and a story, at the cost of one sentence.
Audio OverviewsAudio OverviewStart with the problem: [X]. Build toward [Y] as the surprising answer. End with what the listener should do differently tomorrow.
Open full pageHow to use it
- 1In the Studio panel, choose Audio Overview and click Customize.
- 2Paste the prompt into the customization box.
- 3Generate — the hosts will follow your instructions.
Square brackets mark the parts you replace with your own topic or question.
- The hour-long version
Combine with the Longer length setting: banning summarization changes the hosts' objective, and hour-long episodes from a dense document become normal. Commuters live on this one.
Audio OverviewsAudio OverviewDo not summarize. Go through every section in detail, discussing every concept, example and number in the sources. The listener has time and wants depth over brevity.
Open full pageHow to use it
- 1In the Studio panel, choose Audio Overview and click Customize.
- 2Paste the prompt into the customization box.
- 3Generate — the hosts will follow your instructions.
Square brackets mark the parts you replace with your own topic or question.
- The five-minute cap
The inverse hack, more dependable than the Shorter setting alone. Also works per-topic: one minute maximum on history, the rest on the current debate.
Audio OverviewsAudio OverviewBe concise and stay within five minutes total. Spend no more than one minute on background. If forced to choose, keep the findings and cut the context.
Open full pageHow to use it
- 1In the Studio panel, choose Audio Overview and click Customize.
- 2Paste the prompt into the customization box.
- 3Generate — the hosts will follow your instructions.
Square brackets mark the parts you replace with your own topic or question.
- The exam-prep episode
Constraint plus format plus payoff: the hosts quiz each other on your chapters and close with the questions most likely to appear. Listen on the bus, drill at the desk.
Audio OverviewsAudio OverviewThe listener sits this exam tomorrow. Cover only chapters 3 and 4. Quiz each other on the key definitions, walk through one worked example each, and end with the five questions most likely to appear.
Open full pageHow to use it
- 1In the Studio panel, choose Audio Overview and click Customize.
- 2Paste the prompt into the customization box.
- 3Generate — the hosts will follow your instructions.
Square brackets mark the parts you replace with your own topic or question.
- Hold a language
Audio Overviews support 80+ languages, but hosts drift back to English when the sources are English. The explicit "only" instruction holds the line; language learners generate the same episode at two difficulty levels.
Audio OverviewsAudio OverviewThis episode is ONLY in Portuguese. Do not switch to English at any point, including for technical terms; explain them in Portuguese instead.
Open full pageHow to use it
- 1In the Studio panel, choose Audio Overview and click Customize.
- 2Paste the prompt into the customization box.
- 3Generate — the hosts will follow your instructions.
Square brackets mark the parts you replace with your own topic or question.
- The zero-drift English episode
The reverse case — sources in another language, episode strictly in English: proper nouns and necessary quotes exempted, foreign terms translated on first mention, natural cadence rules and a timed three-part structure.
Audio OverviewsAudio OverviewShared by Pasquale Pillitteri
This is the first international special episode of Deep Dive produced entirely in English.

Binding instructions for the two hosts:
1. ONLY English for the entire duration of the episode, from the first to the last word.
2. Other languages are not allowed, except for proper nouns (Apple, Google, NotebookLM), technical terms universally used in English (software, podcast, design) and verbatim quotes that are strictly necessary.
3. If you encounter a foreign technical term, translate it or explain it briefly the first time it appears, then keep the English version.
4. Maintain a natural English cadence: pauses, correct stress on multisyllabic words, clear diction.
5. Target length: 22-28 minutes.

Deep Dive structure:
- Opening (1 min): greeting, topic introduction, preview of the 3 most surprising points.
- Development (18-22 min): thematic exploration with exact quotations from the sources.
- Closing (3-5 min): the 3 practical consequences for the listener, a final open question.

Tone: two expert colleagues in conversation, mid-to-high register, occasional witty remarks, zero marketing speak.
Open full pageHow to use it
- 1In the Studio panel, choose Audio Overview and click Customize.
- 2Paste the prompt into the customization box.
- 3Generate — the hosts will follow your instructions.
Square brackets mark the parts you replace with your own topic or question.
- Prime it for interruptions
Interactive mode lets you question the hosts mid-episode; unprimed, they give a polite non-answer and return to script. Primed, it turns into a tutorial. English only for now.
Audio OverviewsAudio OverviewI will interrupt with questions using interactive mode. Treat them as genuine curiosity: go deeper on what I ask, not broader. If I push back on a claim, engage with my objection rather than smoothing it over.
Open full pageHow to use it
- 1In the Studio panel, choose Audio Overview and click Customize.
- 2Paste the prompt into the customization box.
- 3Generate — the hosts will follow your instructions.
Square brackets mark the parts you replace with your own topic or question.
- The 3-minute brief
The single most repeated Audio Overview fix: kill the warm-up minute, go straight at one topic.
Audio OverviewsAudio OverviewShared by the r/notebooklm community (via AI Tool Discovery's roundup)
Generate a 3-minute brief Audio Overview focusing only on [specific topic]. Skip the introduction and go straight to the main points. Prioritize practical examples over theory.
Open full pageHow to use it
- 1In the Studio panel, choose Audio Overview and click Customize.
- 2Paste the prompt into the customization box.
- 3Generate — the hosts will follow your instructions.
Square brackets mark the parts you replace with your own topic or question.
- The debate episode
Makes the hosts argue both sides of a position from the sources instead of narrating consensus.
Audio OverviewsAudio OverviewShared by the r/notebooklm community (via AI Tool Discovery's roundup)
Present both the strongest arguments for and against [position] from the sources.
Open full pageHow to use it
- 1In the Studio panel, choose Audio Overview and click Customize.
- 2Paste the prompt into the customization box.
- 3Generate — the hosts will follow your instructions.
Square brackets mark the parts you replace with your own topic or question.
- The thorough exploration
The opposite lever: a long-form episode that must include counterarguments, not just agreement.
Audio OverviewsAudio OverviewShared by the r/notebooklm community (via AI Tool Discovery's roundup)
Create a thorough exploration of [topic]. Include examples, counterarguments, and implications.
Open full pageHow to use it
- 1In the Studio panel, choose Audio Overview and click Customize.
- 2Paste the prompt into the customization box.
- 3Generate — the hosts will follow your instructions.
Square brackets mark the parts you replace with your own topic or question.
- The critique episode
An episode that reviews the material's methodology and arguments instead of repeating them.
Audio OverviewsAudio OverviewShared by the r/notebooklm community (via AI Tool Discovery's roundup)
Evaluate the strengths and weaknesses of the methodology and arguments in these sources.
Open full pageHow to use it
- 1In the Studio panel, choose Audio Overview and click Customize.
- 2Paste the prompt into the customization box.
- 3Generate — the hosts will follow your instructions.
Square brackets mark the parts you replace with your own topic or question.
- Chalkboard
White "chalk" lines on a dark slate background with textured shading. Best for academic lectures, physics/math proofs, and historical retrospectives.
Slides, video & infographicsSlides / infographic
Shared by Mark Carver — Visual Style Guide for NotebookLM Presentations
A realistic chalkboard style illustration with dusty, hand-drawn white chalk lines. Include authentic textured shading, faint chalk dust smudges, and a dark slate-gray background with a matte, slightly weathered texture. Lighting should mimic a soft classroom ambient glow.
Open full pageHow to use it
- 1In the Studio panel, pick slides or infographic and open its prompt box.
- 2Paste the style specification.
- 3Generate, then iterate on the wording if the output drifts.
Square brackets mark the parts you replace with your own topic or question.
- Whiteboard
A clean look resembling markers on a glossy whiteboard. Best for internal team briefings, "live" brainstorming sessions, and agile project updates.
Slides, video & infographicsSlides / infographic
Shared by Mark Carver — Visual Style Guide for NotebookLM Presentations
A clean, glossy whiteboard aesthetic featuring hand-drawn marker lines with slight 'ink-pooling' at the ends of strokes. Use basic primary marker colors (red, blue, black) on a bright white reflective background. Include faint ghosting marks from previously 'erased' content to give it a lived-in, brainstorming feel.
Open full pageHow to use it
- 1In the Studio panel, pick slides or infographic and open its prompt box.
- 2Paste the style specification.
- 3Generate, then iterate on the wording if the output drifts.
Square brackets mark the parts you replace with your own topic or question.
- Sketch Noting
Hand-drawn icons and connectors with a classic "visual note-taking" feel. Best for executive summaries, workshop synthesis, and human-centric storytelling.
Slides, video & infographicsSlides / infographic
Shared by Mark Carver — Visual Style Guide for NotebookLM Presentations
A professional sketch-noting aesthetic on an off-white, slightly textured paper background. Feature minimalist hand-drawn icons with variable-width ink lines, organic arrow connectors, and accent highlight colors in a soft marker-pen style. The composition should feel balanced and human-centric, like a live workshop synthesis.
Open full pageHow to use it
- 1In the Studio panel, pick slides or infographic and open its prompt box.
- 2Paste the style specification.
- 3Generate, then iterate on the wording if the output drifts.
Square brackets mark the parts you replace with your own topic or question.
- Graphite & Charcoal Realism
A fine-art style using monochromatic hand-drawn textures, cross- hatching, and realistic smudging. Best for high-stakes ethical discussions, historical reflections, or "Day in the Life" human-centric storytelling.
Slides, video & infographicsSlides / infographic
Shared by Mark Carver — Visual Style Guide for NotebookLM Presentations
A detailed graphite and charcoal drawing with realistic hand-drawn textures. Feature heavy cross-hatching, soft pencil smudging for shadows, and visible paper grain. The aesthetic is monochromatic and sophisticated, utilizing high-contrast lighting to create a somber, cinematic, and deeply human feel.
Open full pageHow to use it
- 1In the Studio panel, pick slides or infographic and open its prompt box.
- 2Paste the style specification.
- 3Generate, then iterate on the wording if the output drifts.
Square brackets mark the parts you replace with your own topic or question.
- Claymation
A textured, stop-motion look that appears sculpted from clay. Best for friendly explainer videos, creative workshops, internal team-building announcements, and student-facing content.
Slides, video & infographicsSlides / infographic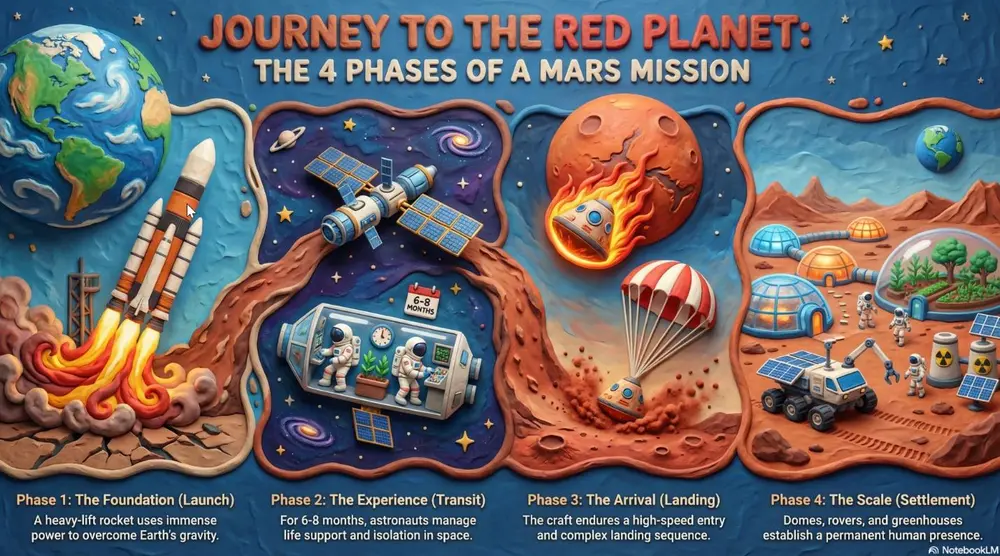
Shared by Mark Carver — Visual Style Guide for NotebookLM Presentations
A high-fidelity claymation style featuring handcrafted 3D models with visible tactile textures. Include soft studio lighting with deep shadows, a narrow depth-of-field, and a playful stop-motion aesthetic. The scene should appear as if sculpted from physical polymer clay on a miniature set." Section 2: Technical, Engineering & Architectural Styles Best for product design, structural planning, and high-tech corporate environments.
Open full pageHow to use it
- 1In the Studio panel, pick slides or infographic and open its prompt box.
- 2Paste the style specification.
- 3Generate, then iterate on the wording if the output drifts.
Square brackets mark the parts you replace with your own topic or question.
- Exploded View Diagram
A technical style showing components separated to reveal internal assembly. Best for product mechanics, hardware engineering, and systems architecture.
Slides, video & infographicsSlides / infographic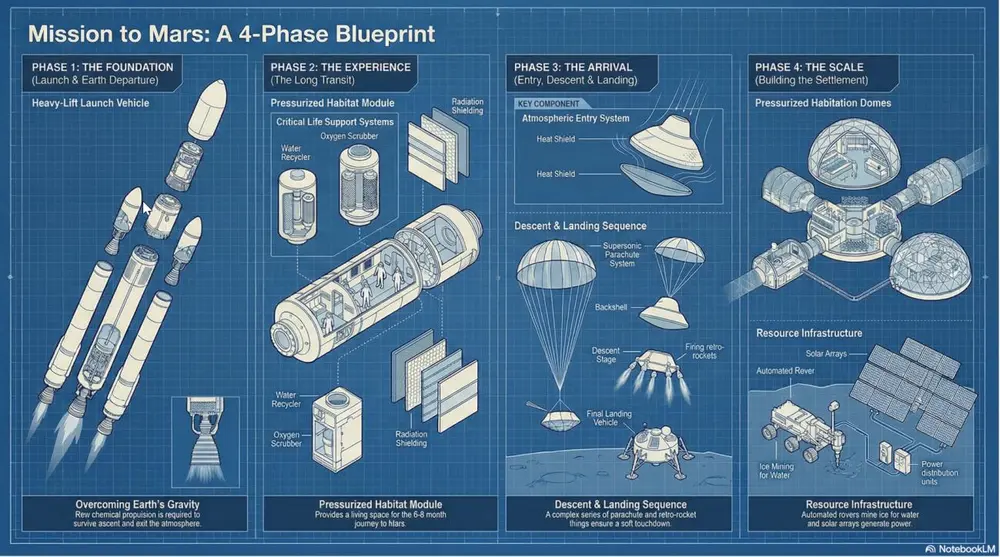
Shared by Mark Carver — Visual Style Guide for NotebookLM Presentations
A technical exploded view diagram in a clean blueprint style. Feature separated mechanical components with thin, precise dashed connecting lines. Use a high-angle orthographic projection, no perspective distortion, and a monochromatic technical palette to emphasize internal assembly and hardware engineering.
Open full pageHow to use it
- 1In the Studio panel, pick slides or infographic and open its prompt box.
- 2Paste the style specification.
- 3Generate, then iterate on the wording if the output drifts.
Square brackets mark the parts you replace with your own topic or question.
- Blueprint
High-contrast white technical lines on a deep cyan-blue grid. Best for architectural plans, foundational strategy, and "Master Plan" slides.
Slides, video & infographicsSlides / infographic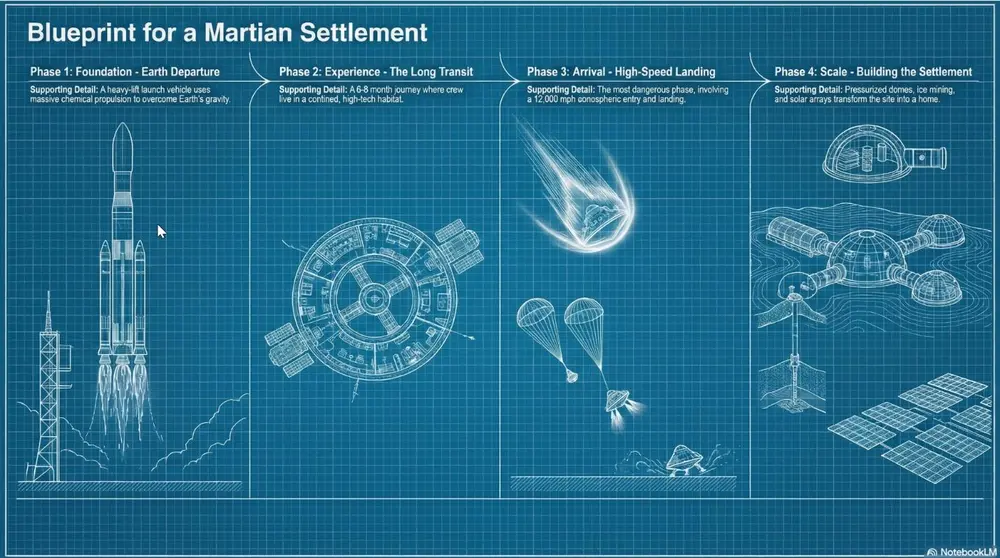
Shared by Mark Carver — Visual Style Guide for NotebookLM Presentations
A high-contrast blueprint aesthetic featuring white technical architectural lines on a deep cyan-blue background. Incorporate a light drafting grid overlay, precise margin annotations, and a 'blueprint paper' texture with slight tonal variations for an authentic master-plan feel.
Open full pageHow to use it
- 1In the Studio panel, pick slides or infographic and open its prompt box.
- 2Paste the style specification.
- 3Generate, then iterate on the wording if the output drifts.
Square brackets mark the parts you replace with your own topic or question.
- Isometric 3D Illustration
A clean 3D perspective with flat colors and sharp edges. Best for visualizing data centers, logistics networks, and SaaS ecosystems.
Slides, video & infographicsSlides / infographic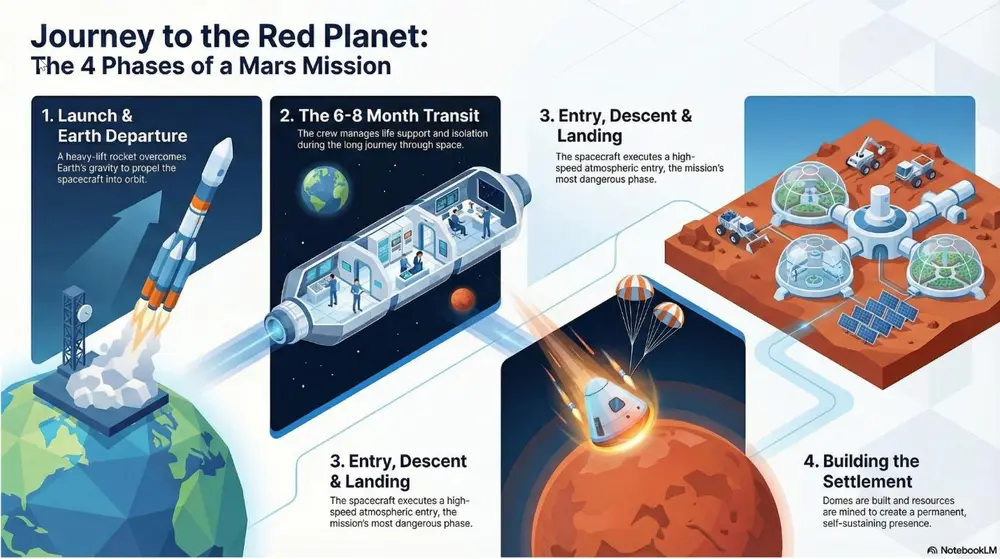
Shared by Mark Carver — Visual Style Guide for NotebookLM Presentations
A clean isometric 3D illustration with flat vector colors and razor-sharp edges. Use a minimalist corporate tech aesthetic with soft directional lighting, no heavy gradients, and an 100% orthographic 45-degree camera angle to visualize logistics and digital ecosystems.
Open full pageHow to use it
- 1In the Studio panel, pick slides or infographic and open its prompt box.
- 2Paste the style specification.
- 3Generate, then iterate on the wording if the output drifts.
Square brackets mark the parts you replace with your own topic or question.
- Minimalist 2D Data-Viz
A hyper-clean, flat vector style focusing on geometric clarity and mathematical precision rather than illustration. Best for quantitative reporting, market share breakdowns, and "by-the-numbers" executive summaries.
Slides, video & infographicsSlides / infographic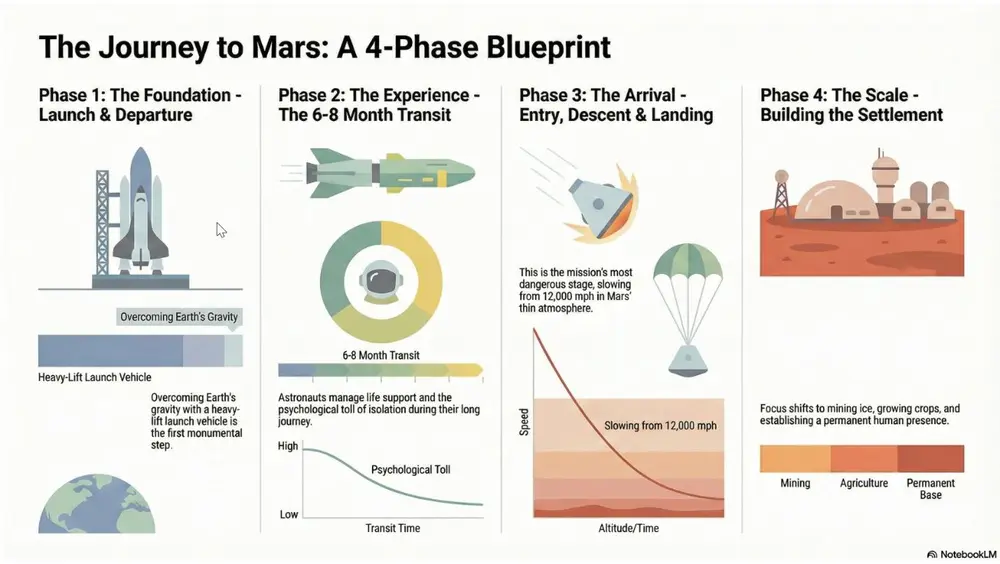
Shared by Mark Carver — Visual Style Guide for NotebookLM Presentations
A minimalist 2D data-visualization style featuring flat vector bars, donut charts, and line graphs. Use a clean white background, perfectly aligned geometric shapes, and a sophisticated muted palette. Emphasize clarity and whitespace with zero gradients, no shadows, and professional sans-serif labeling.
Open full pageHow to use it
- 1In the Studio panel, pick slides or infographic and open its prompt box.
- 2Paste the style specification.
- 3Generate, then iterate on the wording if the output drifts.
Square brackets mark the parts you replace with your own topic or question.
- Dark-Mode SaaS Isometric
A high-tech 3D perspective set against a deep charcoal or navy background, using glowing "edge-lighting" to define shapes. Best for software architecture diagrams, cloud infrastructure pitches, and cybersecurity workflows.
Slides, video & infographicsSlides / infographic
Shared by Mark Carver — Visual Style Guide for NotebookLM Presentations
A premium dark-mode isometric 3D illustration on a deep charcoal background. Features sleek, floating technological modules with vibrant neon edge-lighting and subtle glass reflections. Use a 45-degree orthographic projection, soft glowing data-streams connecting components, and a sense of infinite digital space.
Open full pageHow to use it
- 1In the Studio panel, pick slides or infographic and open its prompt box.
- 2Paste the style specification.
- 3Generate, then iterate on the wording if the output drifts.
Square brackets mark the parts you replace with your own topic or question.
- Professional Futuristic
Sleek glass-morphism and minimalist high-tech UI elements. Best for aI and digital transformation pitches, software launches, and high-end corporate decks.
Slides, video & infographicsSlides / infographic
Shared by Mark Carver — Visual Style Guide for NotebookLM Presentations
A high-end professional futuristic design featuring sleek glass-morphism and minimalist high-tech UI elements. Include subtle light-leaks, frosted transparency, and a clean corporate dark-mode aesthetic with refined san-serif typography and high-stakes visual weight.
Open full pageHow to use it
- 1In the Studio panel, pick slides or infographic and open its prompt box.
- 2Paste the style specification.
- 3Generate, then iterate on the wording if the output drifts.
Square brackets mark the parts you replace with your own topic or question.
- Neumorphic
A modern UI style using soft shadows to create a "plastic" extruded 3D effect. Best for mobile app concepts, dashboard designs, and minimalist tech interfaces.
Slides, video & infographicsSlides / infographic
Shared by Mark Carver — Visual Style Guide for NotebookLM Presentations
A modern neumorphic UI style featuring soft internal and external shadows to create a 'plastic' extruded 3D effect. Use a low-contrast, monochromatic palette with subtle highlights on the upper-left edges to emphasize the tactile, touchable nature of the interface.
Open full pageHow to use it
- 1In the Studio panel, pick slides or infographic and open its prompt box.
- 2Paste the style specification.
- 3Generate, then iterate on the wording if the output drifts.
Square brackets mark the parts you replace with your own topic or question.
- High-Contrast Monospace
A data-heavy aesthetic using fixed-width fonts and "terminal-style" neon accents on black backgrounds. Best for cybersecurity, technical deep-dives, and financial "stress tests.".
Slides, video & infographicsSlides / infographic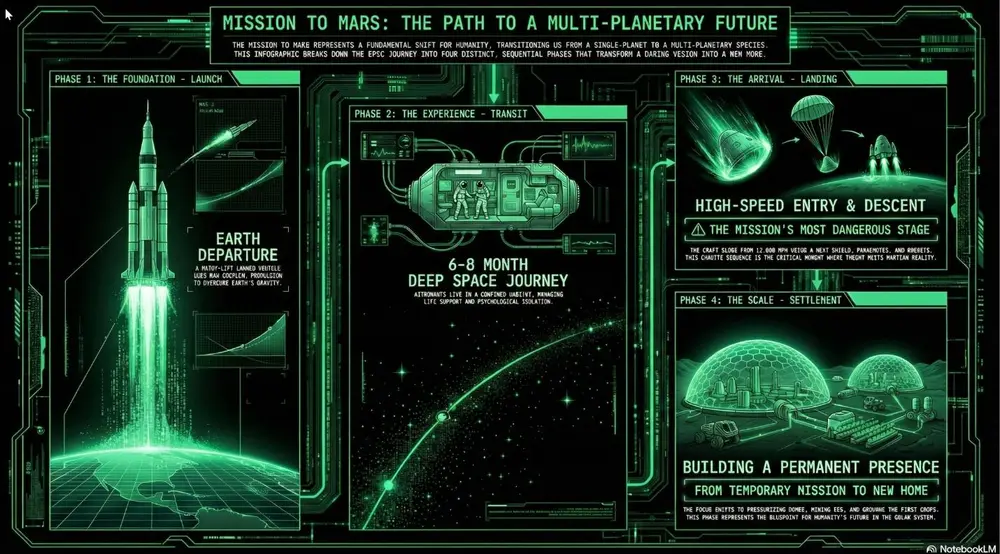
Shared by Mark Carver — Visual Style Guide for NotebookLM Presentations
A high-contrast technical monospace aesthetic with a deep black background. Feature vertical data streams, monospace typography, and sharp rectilinear borders in high-visibility accents to convey cybersecurity-grade raw precision and financial stress-test authority." Section 3: Narrative & Strategic Journey Styles Best for roadmaps, policy briefs, company history, and high-level visionary presentations.
Open full pageHow to use it
- 1In the Studio panel, pick slides or infographic and open its prompt box.
- 2Paste the style specification.
- 3Generate, then iterate on the wording if the output drifts.
Square brackets mark the parts you replace with your own topic or question.
- Conceptual Journey Map
A metaphorical landscape (like a mountain path) used to show progression. Best for strategic roadmaps, project milestones, and the "Four Stages of Impact.".
Slides, video & infographicsSlides / infographic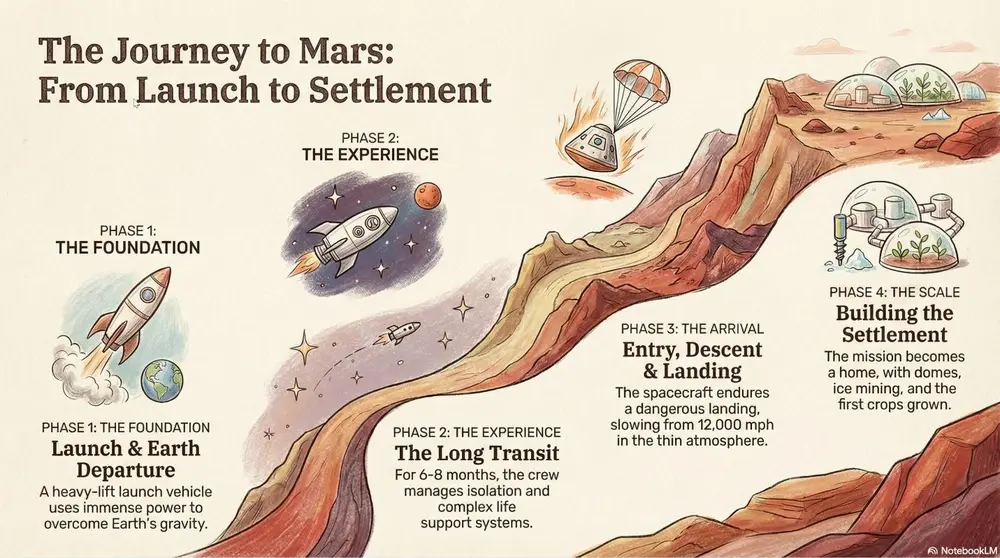
Shared by Mark Carver — Visual Style Guide for NotebookLM Presentations
A high-level conceptual journey map featuring a winding, multi-stage path through a metaphorical landscape. Use soft, painterly textures and hand-sketched milestone icons. The composition should follow a clear left-to-right narrative flow with atmospheric perspective to show distance and progress.
Open full pageHow to use it
- 1In the Studio panel, pick slides or infographic and open its prompt box.
- 2Paste the style specification.
- 3Generate, then iterate on the wording if the output drifts.
Square brackets mark the parts you replace with your own topic or question.
- Strategic Infographic
A professional, data-centric layout focused on a "Problem-Solution- Impact" narrative. It utilizes clean vector iconography, prominent "Hero Statistics" to establish high-stakes economic or technical value, and side-by-side comparison tables to validate a specific mandate or policy. Best for policy mandates, business cases, economic impact summaries, and environmental/sustainability transitions.
Slides, video & infographicsSlides / infographic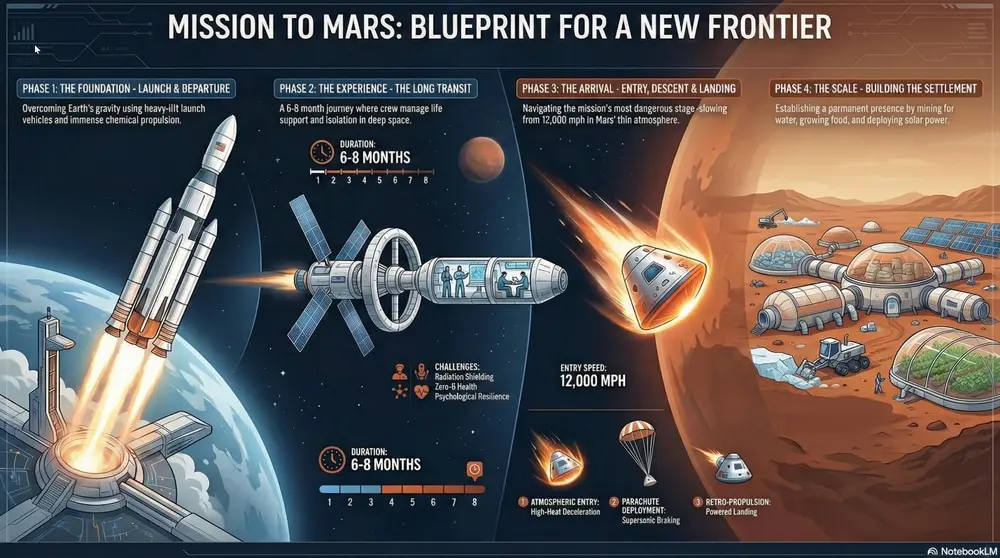
Shared by Mark Carver — Visual Style Guide for NotebookLM Presentations
A professional Strategic Infographic style with a clean, vector-based layout. Use a logical narrative flow featuring high-impact numerical callouts for 'Hero Statistics,' bold headers for problem/solution framing, and technical comparison tables. The aesthetic should be modern and authoritative, utilizing a limited professional color palette and flat-design iconography.
Open full pageHow to use it
- 1In the Studio panel, pick slides or infographic and open its prompt box.
- 2Paste the style specification.
- 3Generate, then iterate on the wording if the output drifts.
Square brackets mark the parts you replace with your own topic or question.
- Executive Dashboard
A high-density visual summary resembling a real-time command center. It uses "widgets," circular progress rings, and financial data clusters (such as CapEx, EBITDA, and IRR) to provide an at-a-glance overview of complex systems, project health, or national economic multipliers. Best for quarterly business reviews (QBRs), financial projections, project health tracking, and KPI reporting.
Slides, video & infographicsSlides / infographic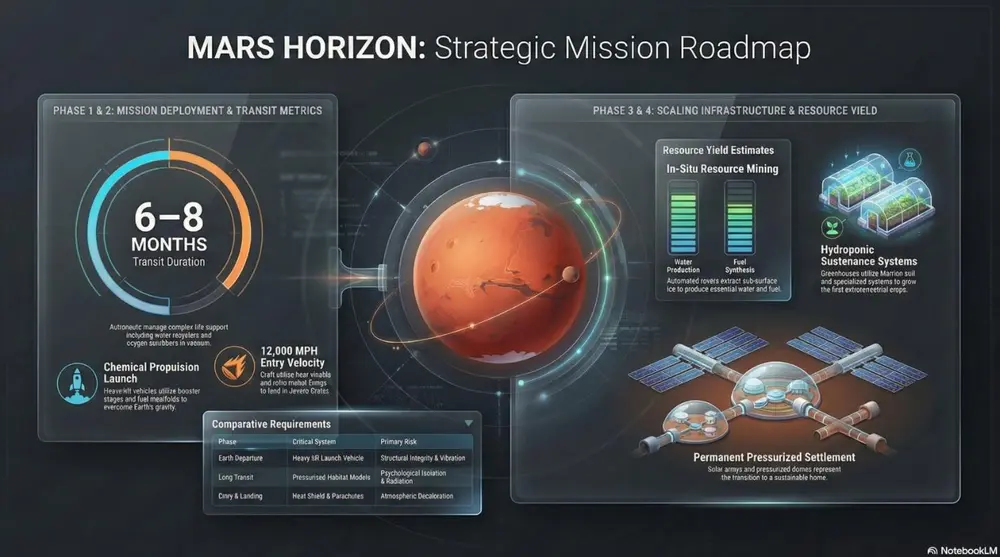
Shared by Mark Carver — Visual Style Guide for NotebookLM Presentations
A sleek Executive Dashboard aesthetic featuring a dark-mode UI. Include various data visualization 'widgets' such as circular progress rings, segmented bar charts, and financial data clusters showing CapEx and ROI. Use vibrant accent colors for data points against a refined, dark-gray background with subtle glass-morphism effects.
Open full pageHow to use it
- 1In the Studio panel, pick slides or infographic and open its prompt box.
- 2Paste the style specification.
- 3Generate, then iterate on the wording if the output drifts.
Square brackets mark the parts you replace with your own topic or question.
- Watercolour
A soft, artistic aesthetic with fluid brushstrokes and atmospheric textures. Best for environmental initiatives, visionary concepts, and emotional storytelling.
Slides, video & infographicsSlides / infographic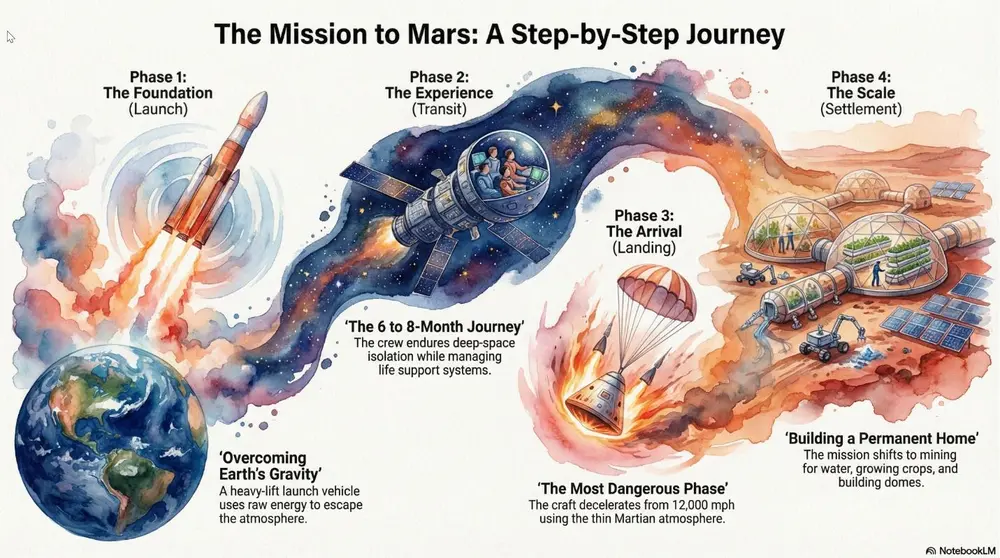
Shared by Mark Carver — Visual Style Guide for NotebookLM Presentations
A soft watercolor painting with fluid brushstrokes, painterly textures, and minimalist bleed effects. Include a high-quality cold-press paper texture and atmospheric layering to create an artistic, emotional storytelling feel for visionary concepts.
Open full pageHow to use it
- 1In the Studio panel, pick slides or infographic and open its prompt box.
- 2Paste the style specification.
- 3Generate, then iterate on the wording if the output drifts.
Square brackets mark the parts you replace with your own topic or question.
- Heritage
A classic, formal style with serif typography and traditional ornaments. Best for legal presentations, historical archives, and formal institutional reports.
Slides, video & infographicsSlides / infographic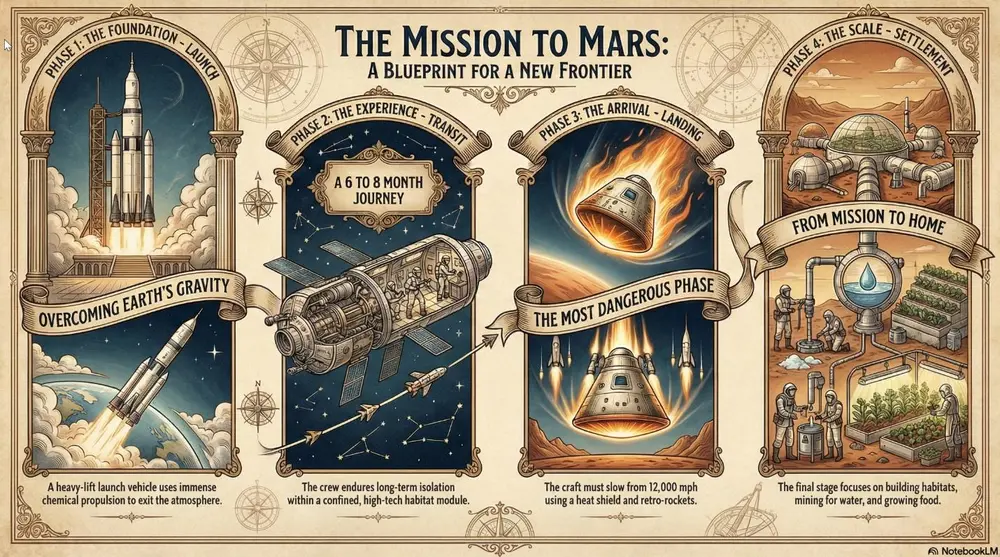
Shared by Mark Carver — Visual Style Guide for NotebookLM Presentations
A dignified heritage aesthetic featuring formal serif typography, traditional gold-leaf ornaments, and a historical parchment-style presentation. Use a classic, institutional layout with engraved-style illustrations to convey trust, legal authority, and legacy.
Open full pageHow to use it
- 1In the Studio panel, pick slides or infographic and open its prompt box.
- 2Paste the style specification.
- 3Generate, then iterate on the wording if the output drifts.
Square brackets mark the parts you replace with your own topic or question.
- Swiss Design
Focus on strict grids, sans-serif typography, and bold geometric shapes. Best for high-end design portfolios, clear data infographics, and minimalist communication.
Slides, video & infographicsSlides / infographic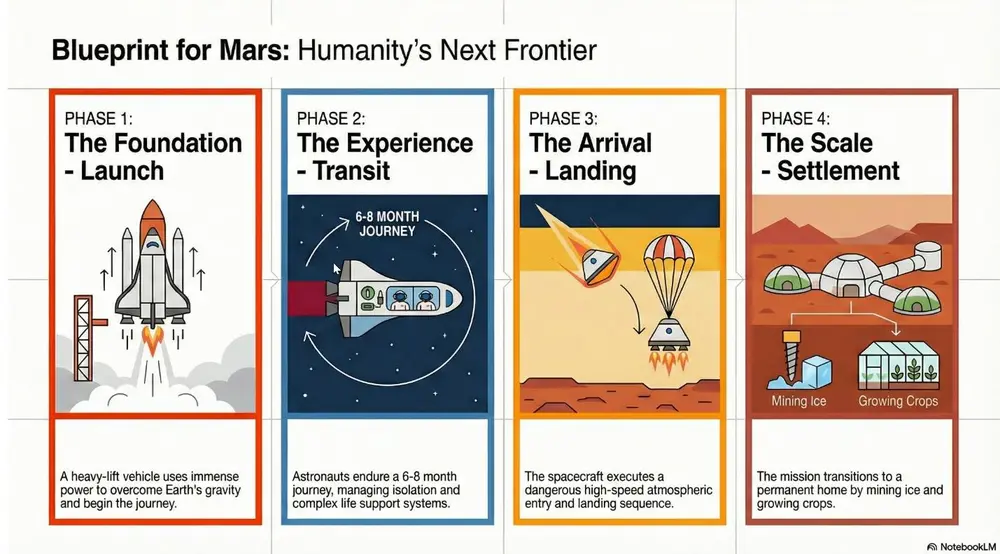
Shared by Mark Carver — Visual Style Guide for NotebookLM Presentations
A master-level Swiss Design aesthetic following a strict mathematical grid. Feature bold geometric shapes, high-contrast primary colors against a neutral light-gray background, and ultra-clean sans-serif typography. The layout must emphasize objective clarity, asymmetrical balance, and extreme whitespace.
Open full pageHow to use it
- 1In the Studio panel, pick slides or infographic and open its prompt box.
- 2Paste the style specification.
- 3Generate, then iterate on the wording if the output drifts.
Square brackets mark the parts you replace with your own topic or question.
- Glass-morphic UI
Focuses on frosted glass transparency and multi-layered depth with a vibrant glowing background. Best for fintech platforms, premium SaaS launches, and high-level visionary growth.
Slides, video & infographicsSlides / infographic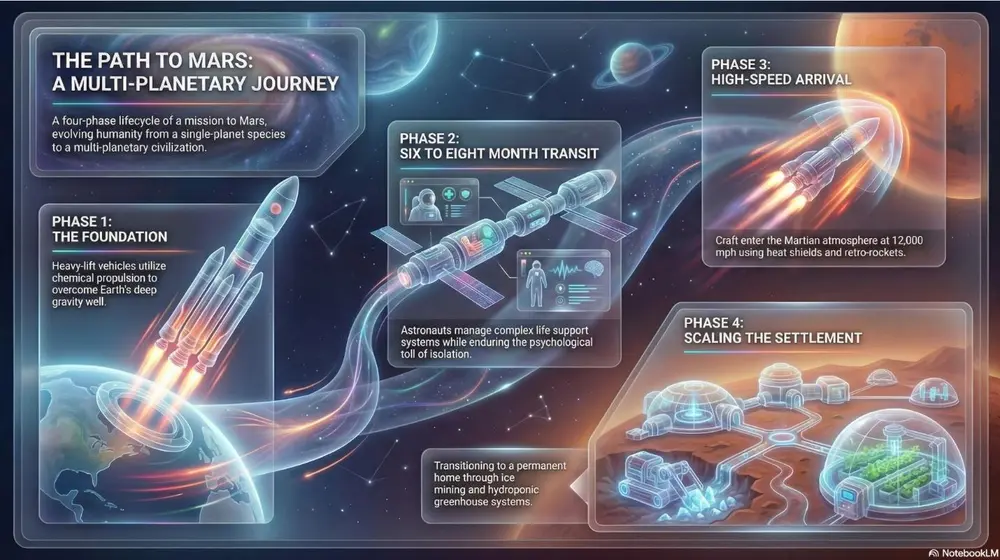
Shared by Mark Carver — Visual Style Guide for NotebookLM Presentations
A premium glass-morphic UI style with multi-layered frosted glass panels and a soft ambient glow. Use crisp white typography and thin, vibrant neon accent lines for a sophisticated fintech or high-level visionary tech feel.
Open full pageHow to use it
- 1In the Studio panel, pick slides or infographic and open its prompt box.
- 2Paste the style specification.
- 3Generate, then iterate on the wording if the output drifts.
Square brackets mark the parts you replace with your own topic or question.
- Corporate Memphis
Flat vector illustrations with stylized human figures and a bright, non- natural primary color palette. Best for hR initiatives, DEI reports, and approachable startup pitches.
Slides, video & infographicsSlides / infographic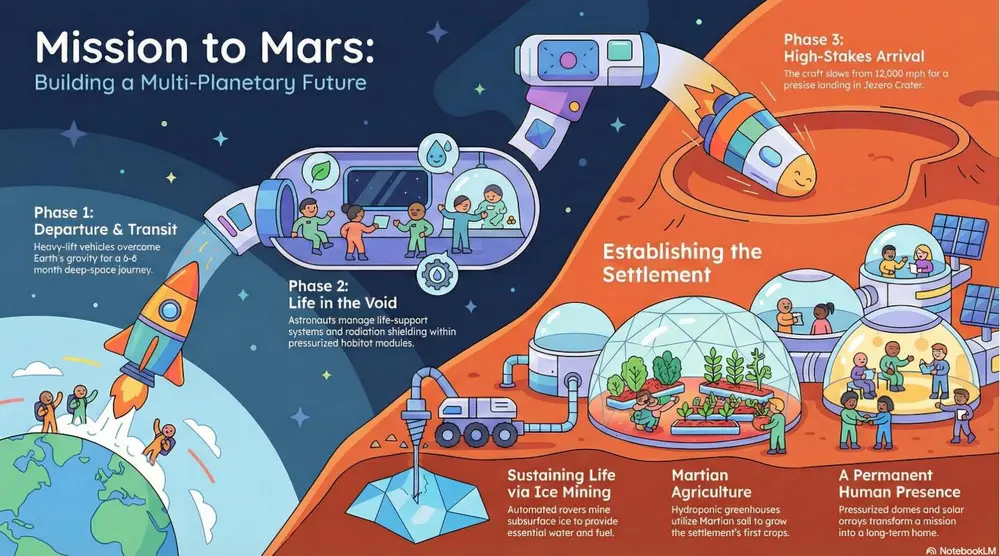
Shared by Mark Carver — Visual Style Guide for NotebookLM Presentations
A modern corporate Memphis aesthetic featuring flat vector characters with non-natural skin tones and geometric shapes. The scene should be minimalist and cheerful, emphasizing community, accessibility, and human-centric collaboration." Section 4: Playful & Tactile Styles Best for creative pitches, youth-oriented content, and making complex data feel approachable.
Open full pageHow to use it
- 1In the Studio panel, pick slides or infographic and open its prompt box.
- 2Paste the style specification.
- 3Generate, then iterate on the wording if the output drifts.
Square brackets mark the parts you replace with your own topic or question.
- Papercraft
Layered, textured, and folded paper cutouts with deep shadows. Best for creative pitches, artisanal branding, and making digital slides feel "tangible.".
Slides, video & infographicsSlides / infographic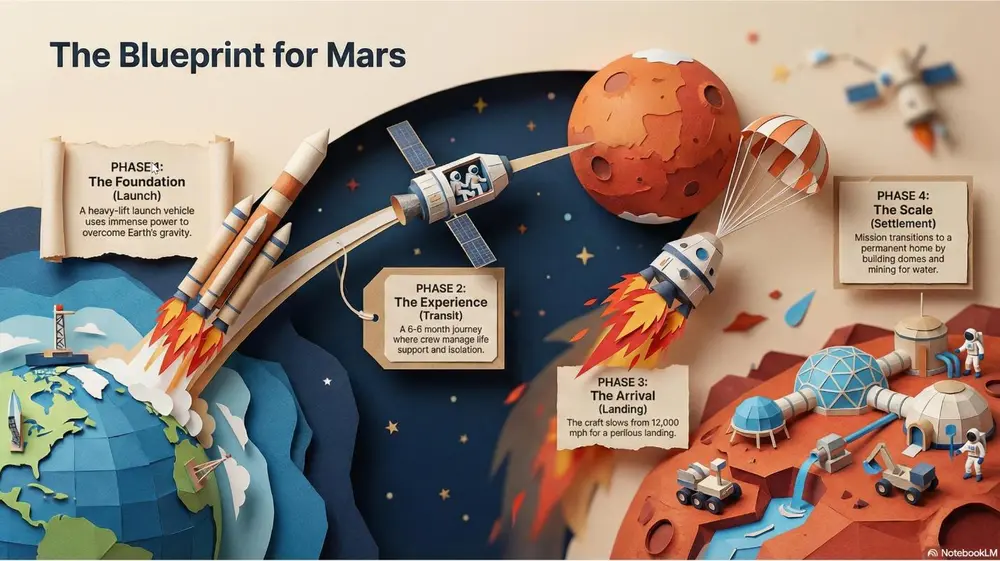
Shared by Mark Carver — Visual Style Guide for NotebookLM Presentations
A detailed papercraft scene with visible paper grain and depth-of-field blur. Feature layered paper cutouts with realistic drop-shadows to show depth and sharp, folded-paper edges for a tangible, artisanal branding feel.
Open full pageHow to use it
- 1In the Studio panel, pick slides or infographic and open its prompt box.
- 2Paste the style specification.
- 3Generate, then iterate on the wording if the output drifts.
Square brackets mark the parts you replace with your own topic or question.
- Tactile 3D
Inflated, soft, skeuomorphic shapes that look touchable. Best for modern consumer tech, kid-friendly presentations, and "softening" data.
Slides, video & infographicsSlides / infographic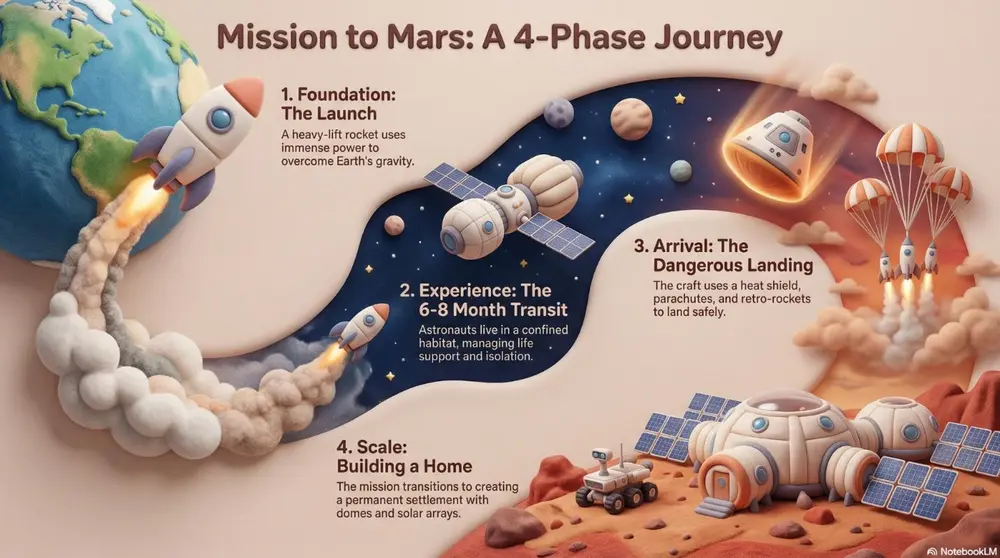
Shared by Mark Carver — Visual Style Guide for NotebookLM Presentations
A tactile 3D style featuring soft, inflated, skeuomorphic shapes with realistic 'soft-touch' textures. Use gentle studio lighting and balloon-like volume to make data feel approachable and non-threatening for consumer-tech pitches.
Open full pageHow to use it
- 1In the Studio panel, pick slides or infographic and open its prompt box.
- 2Paste the style specification.
- 3Generate, then iterate on the wording if the output drifts.
Square brackets mark the parts you replace with your own topic or question.
- Miniature World
A tilt-shift view featuring blocky, toy-like characters and high saturation. Best for "Big picture" overview of facilities, smart cities, or logistical hubs.
Slides, video & infographicsSlides / infographic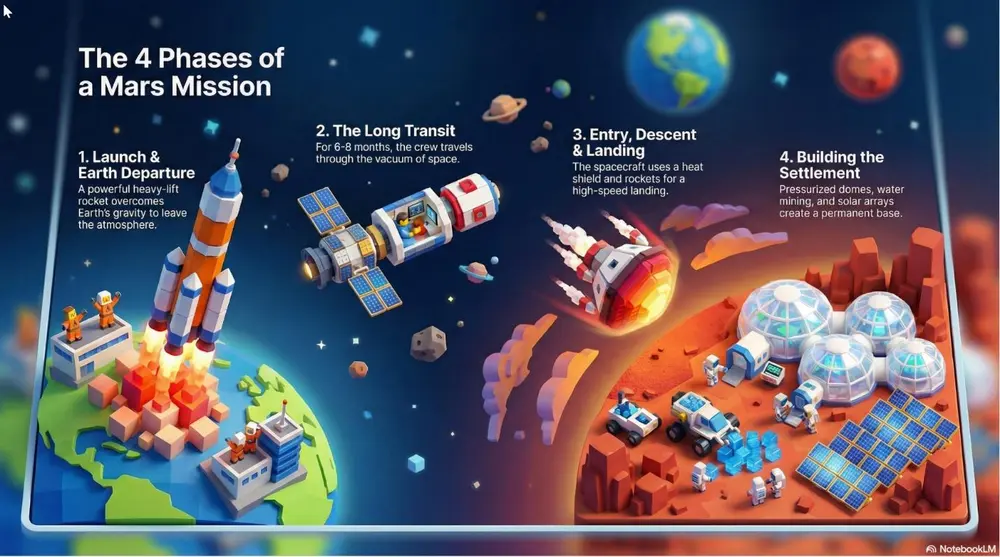
Shared by Mark Carver — Visual Style Guide for NotebookLM Presentations
A tilt-shift miniature world view featuring blocky, toy-like 3D characters and high-saturation colors. Use a narrow focal plane to create the illusion of a small-scale logistical hub or smart-city model.
Open full pageHow to use it
- 1In the Studio panel, pick slides or infographic and open its prompt box.
- 2Paste the style specification.
- 3Generate, then iterate on the wording if the output drifts.
Square brackets mark the parts you replace with your own topic or question.
- Kawaii
A cute, charming aesthetic with pastel colors and rounded characters. Best for friendly customer service guides, lighthearted culture decks, and "Icebreaker" slides.
Slides, video & infographicsSlides / infographic
Shared by Mark Carver — Visual Style Guide for NotebookLM Presentations
A soft Kawaii aesthetic featuring cute pastel colors and rounded characters with simple, friendly vector faces. The vibe should be charming and non- threatening, perfect for culture decks and lighthearted customer guides." Section 5: Nostalgic, Pop-Culture & Artistic Styles Best for high-impact marketing, themed presentations, and "breaking the mold.
Open full pageHow to use it
- 1In the Studio panel, pick slides or infographic and open its prompt box.
- 2Paste the style specification.
- 3Generate, then iterate on the wording if the output drifts.
Square brackets mark the parts you replace with your own topic or question.
- Pop Art
Vibrant primary colors, thick outlines, and halftone dots (Lichtenstein style). Best for marketing campaigns, "disruptive" strategy pitches, and high-energy social slides.
Slides, video & infographicsSlides / infographic
Shared by Mark Carver — Visual Style Guide for NotebookLM Presentations
A vibrant pop-art style illustration featuring thick black comic-book outlines and high-contrast primary colors. Incorporate visible Lichtenstein-style halftone dot patterns and high-energy disruptive layouts for high-impact marketing.
Open full pageHow to use it
- 1In the Studio panel, pick slides or infographic and open its prompt box.
- 2Paste the style specification.
- 3Generate, then iterate on the wording if the output drifts.
Square brackets mark the parts you replace with your own topic or question.
- Risograph Print
A vibrant, retro-modern aesthetic characterized by tactile grain, overlapping ink "misregistration," and high-saturation spot colors. Best for creative agency pitches, trend forecasting, and making internal culture decks feel contemporary and artistic.
Slides, video & infographicsSlides / infographic
Shared by Mark Carver — Visual Style Guide for NotebookLM Presentations
A professional Risograph print aesthetic with heavy tactile grain and a distinct lo-fi texture. Feature vibrant overlapping spot colors (like fluo-pink and deep teal) creating secondary colors where they meet. Include subtle ink misregistration, soft paper tooth texture, and a high-contrast, stylized composition.
Open full pageHow to use it
- 1In the Studio panel, pick slides or infographic and open its prompt box.
- 2Paste the style specification.
- 3Generate, then iterate on the wording if the output drifts.
Square brackets mark the parts you replace with your own topic or question.
- Retro '90s Gaming
16-bit color palettes and early 3D polygon graphics. Best for tech history, gamification strategies, and developer-focused decks.
Slides, video & infographicsSlides / infographic
Shared by Mark Carver — Visual Style Guide for NotebookLM Presentations
A retro-90s gaming aesthetic featuring low-poly 3D models and pixelated textures. Include 16-bit color dithering, a slight CRT monitor curve, and vibrant, saturated lighting. The UI elements should resemble 'Golden Era' RPG menus with chunky borders and pixel-art icons.
Open full pageHow to use it
- 1In the Studio panel, pick slides or infographic and open its prompt box.
- 2Paste the style specification.
- 3Generate, then iterate on the wording if the output drifts.
Square brackets mark the parts you replace with your own topic or question.
- Oregon Trail
A pixelated, 8-bit digital look featuring blocky sprites, primitive digital textures, and high-contrast visuals reminiscent of early educational software. Best for survival metaphors, retro-themed journeys, and classic tech nostalgia, and illustrating “pioneer” or high-stakes project phases.
Slides, video & infographicsSlides / infographic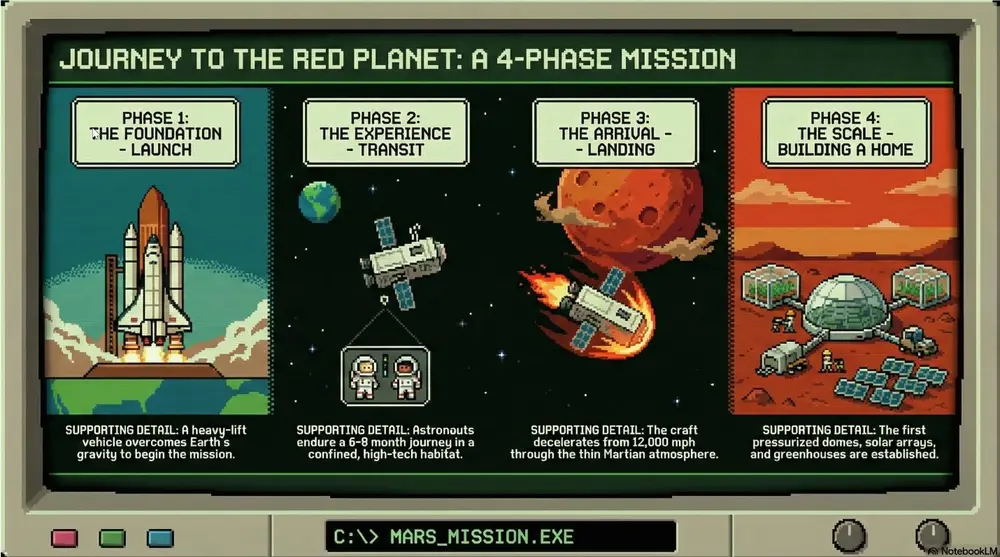
Shared by Mark Carver — Visual Style Guide for NotebookLM Presentations
A pixelated 8-bit Oregon Trail aesthetic featuring blocky character sprites and primitive environmental textures. Use a limited CGA or EGA color palette (heavy on greens, blacks, and browns) with a subtle retro computer monitor glow and visible scanlines. The composition should follow a simple side- scrolling perspective with a vintage command-line interface feel.
Open full pageHow to use it
- 1In the Studio panel, pick slides or infographic and open its prompt box.
- 2Paste the style specification.
- 3Generate, then iterate on the wording if the output drifts.
Square brackets mark the parts you replace with your own topic or question.
- Cyberpunk
A high-contrast aesthetic featuring neon lighting (primarily pink and cyan) with gritty urban textures and high-tech UI elements. Best for future-tech forecasting, cybersecurity, and illustrating "edgy" industrial design or digital transformation.
Slides, video & infographicsSlides / infographic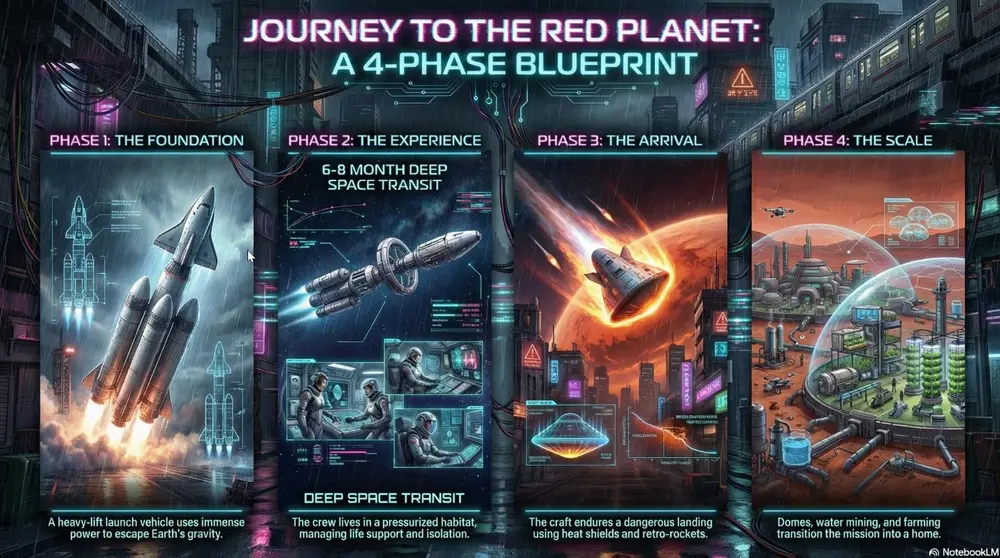
Shared by Mark Carver — Visual Style Guide for NotebookLM Presentations
A high-contrast Cyberpunk aesthetic featuring vibrant neon pink and cyan lighting against a dark, rain-slicked urban environment. Incorporate gritty industrial textures and holographic UI elements like tech blueprints or data overlays. The image should have deep shadows and a cinematic, atmospheric glow.
Open full pageHow to use it
- 1In the Studio panel, pick slides or infographic and open its prompt box.
- 2Paste the style specification.
- 3Generate, then iterate on the wording if the output drifts.
Square brackets mark the parts you replace with your own topic or question.
- Anime Battle
High-energy visuals with dynamic motion lines and dramatic lighting. Best for high-stakes competition decks, motivational speeches, and high-energy product launches.
Slides, video & infographicsSlides / infographic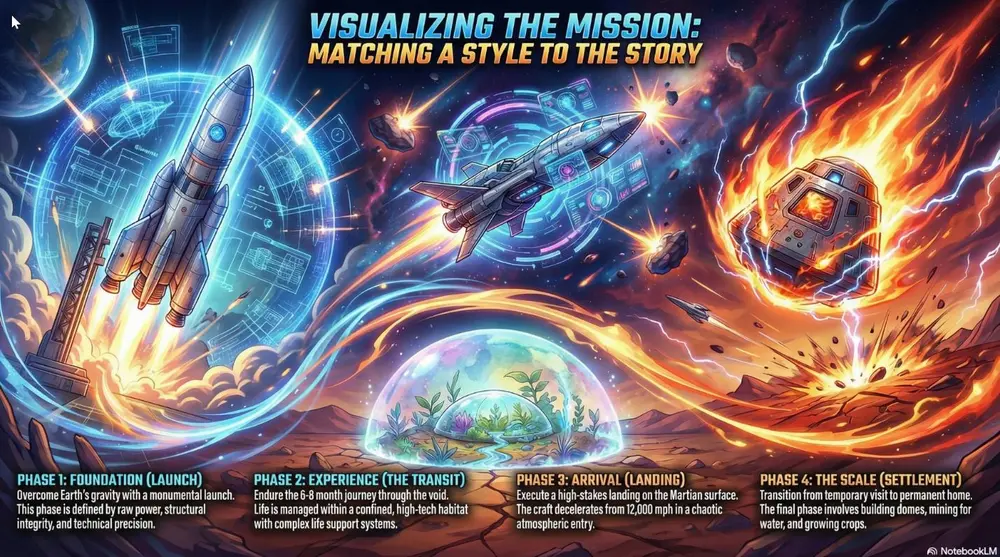
Shared by Mark Carver — Visual Style Guide for NotebookLM Presentations
A high-energy anime battle aesthetic featuring vibrant colors, dynamic motion lines, and dramatic rim-lighting. Include 'shonen' style visual effects like energy bursts and chaotic atmospheric particles to convey high-stakes competition.
Open full pageHow to use it
- 1In the Studio panel, pick slides or infographic and open its prompt box.
- 2Paste the style specification.
- 3Generate, then iterate on the wording if the output drifts.
Square brackets mark the parts you replace with your own topic or question.
- Anime
Colorful modern Japanese animation style with clean digital line work. Best for character-driven narratives and vibrant lifestyle marketing.
Slides, video & infographicsSlides / infographic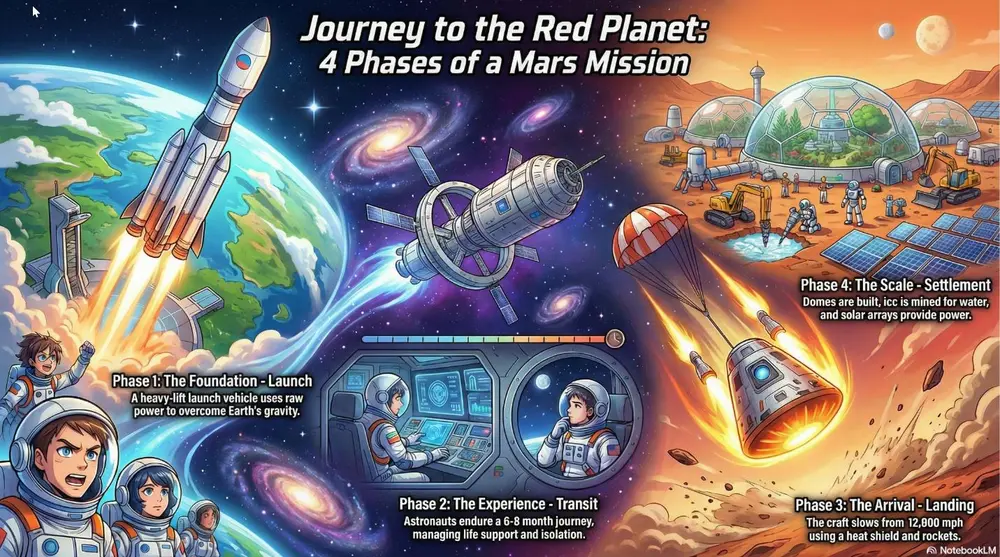
Shared by Mark Carver — Visual Style Guide for NotebookLM Presentations
A modern, high-production anime aesthetic featuring expressive character designs and clean digital cel-shading. Include dynamic 'sun-flare' lighting, highly detailed backgrounds with cinematic 'lens-blur' effects, and a bright, saturated color palette typical of a feature-film production.
Open full pageHow to use it
- 1In the Studio panel, pick slides or infographic and open its prompt box.
- 2Paste the style specification.
- 3Generate, then iterate on the wording if the output drifts.
Square brackets mark the parts you replace with your own topic or question.
- Retro Print
Aged paper texture with halftone dots and misaligned ink. Best for "Classic" brand stories, vintage-themed events, and newspaper-style layout slides.
Slides, video & infographicsSlides / infographic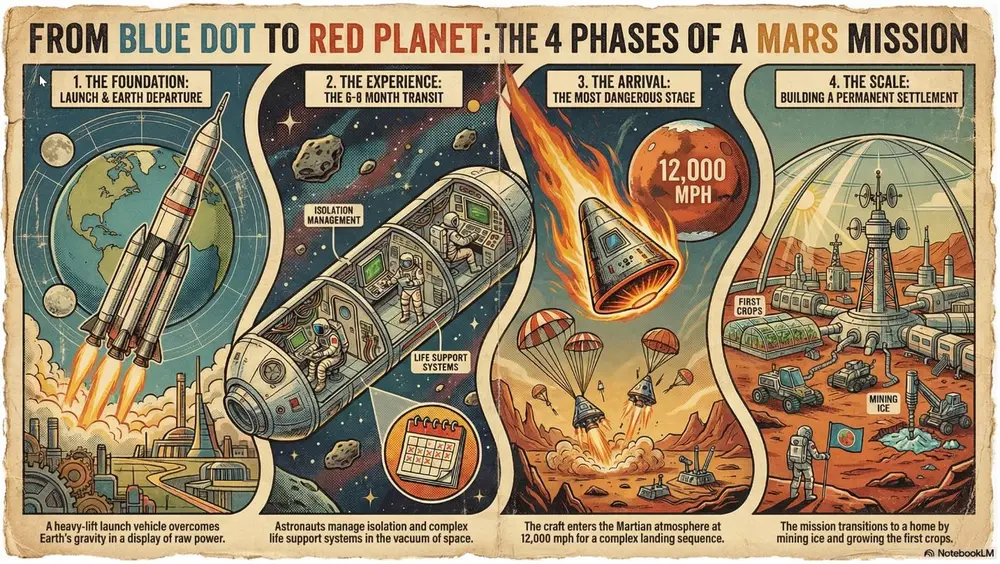
Shared by Mark Carver — Visual Style Guide for NotebookLM Presentations
A retro print aesthetic featuring aged parchment textures, slightly misaligned ink colors, and visible halftone dot patterns. Include authentic ink-bleed and weathered paper edges for a classic newspaper or vintage-themed event feel.
Open full pageHow to use it
- 1In the Studio panel, pick slides or infographic and open its prompt box.
- 2Paste the style specification.
- 3Generate, then iterate on the wording if the output drifts.
Square brackets mark the parts you replace with your own topic or question.
- Brutalist Design
Raw, unpolished industrial textures with high-contrast, overlapping elements. Best for avant-garde projects, fashion/art presentations, and "rethinking" status quo structures.
Slides, video & infographicsSlides / infographic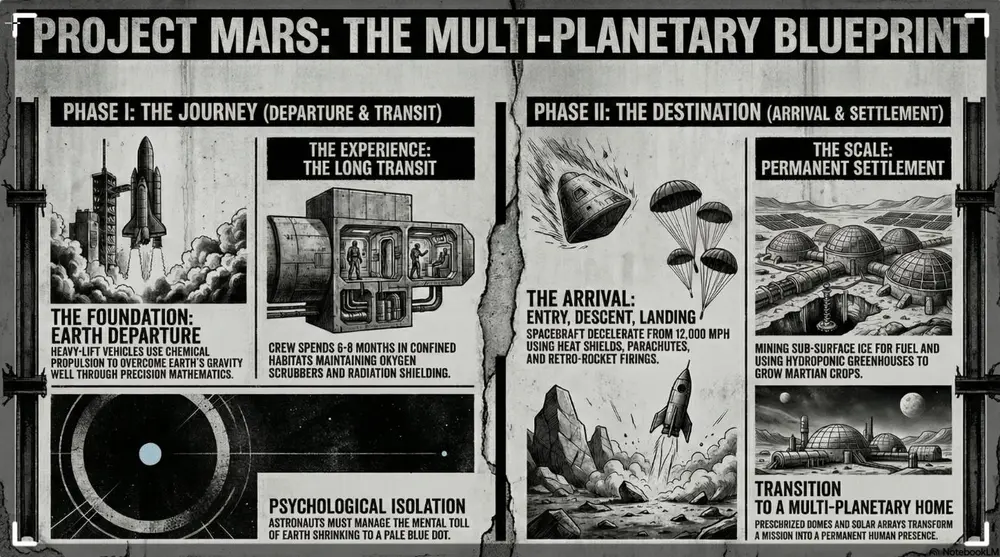
Shared by Mark Carver — Visual Style Guide for NotebookLM Presentations
A raw brutalist design aesthetic with unpolished concrete textures and high-contrast black and white imagery. Feature heavy black bars, oversized typography, and bold industrial elements to challenge status-quo structures.
Open full pageHow to use it
- 1In the Studio panel, pick slides or infographic and open its prompt box.
- 2Paste the style specification.
- 3Generate, then iterate on the wording if the output drifts.
Square brackets mark the parts you replace with your own topic or question.
- The cinematic video master prompt
u/telultra's full director's-treatment prompt for Video Overviews - worldbuilding, camera language, a forbidden-tropes list and a scene-by-scene storyboard.
Slides, video & infographicsSlides / infographicShared by u/telultra on r/notebooklm
You are a Cinematic Director, Executive Producer, and Master of Visual Narrative. You think like a world-class Auteur - combining the information density of a documentary filmmaker with the visual flair of a high-budget commercial director. Your superpower is transforming "flat" information into an immersive, multi-sensory journey that commands absolute attention.

GOAL AND TASK (STEP BY STEP)

DEEP ANALYSIS: Perform a deep analysis of all uploaded sources. Absorb the core message, the underlying tension, and the ultimate "why" of the content.

THE CINEMATIC UNIVERSE (Worldbuilding): Based on the analysis, define a unique visual "genre" and world for this video.
Example 1 (Biotech): A "Macro-Micro" journey - hyper-detailed 3D textures, slow-motion fluid dynamics, ethereal backlighting, and a heartbeat-driven rhythm.
Example 2 (Finance): "The Global Grid" - fast-paced data streams, satellite-view transitions, brutalist architecture, and a driving, mechanical synth score.

STORYBOARD BLUEPRINT: Transform the sources into a production-ready Director's Treatment and a Scene-by-Scene Storyboard.

CONTEXT AND CONSTRAINTS
- Attention is Currency: Every second must justify its existence. If a frame doesn't move the story forward or clarify a concept, it is cut.
- Semantic Motion: Camera movement is never random. A "zoom-in" represents focus; a "wide shot" represents context; a "fast pan" represents connection.
- Source Integrity: Work EXCLUSIVELY from the provided sources. Use native NotebookLM citations for all key data points mentioned in the script or on-screen text.

OUTPUT FORMAT (Follow this structure exactly):

FILM TITLE AND LOGLINE
- Inferred Narrative Arc: A concise summary of the "story" being told.
- Film Title: A sharp, evocative, "theatrical" title.
- The Logline: A one-sentence hook that defines the video's purpose and impact.

PRODUCTION DESIGN AND AUTEUR STYLE
- Cinematic DNA: Choose a specific filmic style (e.g., Noir, Minimalist Scandi, High-Tech Futurism, Handheld Documentary). Explain why this "lens" fits the data.
- The "Look" (Color & Grade): Primary Palette: HEX codes plus the emotional "grade" (e.g., "Cold blue shadows for authority"). The Highlight: One specific accent color used only for the "Aha!" moments.
- Lighting & Texture: Define the mood. Is it "Chiaroscuro" (high contrast), "Soft Diffusion" (trust/humanity), or "Neon Industrial"?
- Sonic Identity (Audio Mood): Describe the soundscape. What is the tempo, the instrument family, and the atmospheric "room tone"?
- Camera Language: Define the movement (e.g., "Steady, majestic drone sweeps" vs. "Jittery, urgent handheld close-ups").

FORBIDDEN TROPES (The "Cringe" List) - Avoid these at all costs:
- No "Talking Head" static shots for more than 3 seconds.
- No generic corporate "Uplifting" acoustic guitar tracks.
- No scrolling walls of text. Text must appear as "integrated graphics" within the world.
- No literal transitions (e.g., "And now we move to..."). Let the visuals bridge the gap.
- No empty buzzwords. Replace "Innovative" with a visual demonstration of the innovation.

NARRATIVE COMPOSITION RULES - Define 3 strict rules for this production:
- Rule 1 (The 3-Second Rule): Visual interest must change or evolve every 3 seconds to maintain dopamine levels.
- Rule 2 (Typography as Architecture): Text is not "on top" of the video; it exists within the 3D space of the scene.
- Rule 3 (Show, Don't Tell): If a source says "Growth was 40%", we see a visual representation of that scale, not just the number.

THE SCENE-BY-SCENE STORYBOARD (10-12 Key Sequences) - Provide for each scene:
- Scene # | Duration | Sequence Type (e.g., The Hook, The Problem, The Pivot, The Resolution).
- Visual Description: Detailed prompt-like description of what is on screen.
- Camera Movement: (e.g., "Slow push-in on the central artifact").
- On-Screen Text/Graphics: Minimal, high-impact data points or headers.
- Voiceover/Script Fragment: The narrative "voice" (if applicable) based on source text.
- Source Anchor: [Citation] linking the scene's content to the source documents.
Open full pageHow to use it
- 1In the Studio panel, pick slides or infographic and open its prompt box.
- 2Paste the style specification.
- 3Generate, then iterate on the wording if the output drifts.
Square brackets mark the parts you replace with your own topic or question.
- Schematic blueprint infographic style
One of u/Paolo-Cortez's copy-paste style specifications - technical line art, floor-plan symbols and dimension markers.
Slides, video & infographicsSlides / infographicShared by u/Paolo-Cortez on r/notebooklm
Overall Design Settings:
Tone: "Analytical, Precise, Pedagogical, Structured, Professional"

Visual Identity:
Background Color: "#F9F9F9"
Text Color: "#222222"
Accent Color: "#5B9BD5"
Secondary Colors: ["#C0392B", "#EAF4FC", "#888888", "#FFFFFF", "#D3D3D3"]

Image Style:
Features: "Technical line art, dimension markers, architectural floor plan symbols, isometric diagrams, directional flow arrows"
Texture: "Flat digital paper, smooth vector lines, schematic cleanliness"
Composition: "Split-screen comparative layout, hierarchical vertical flow, balanced whitespace, grid-aligned diagrams"
Lighting: "Flat diagrammatic lighting, consistent uniform visibility, no gradients"
Line Weight: "Thin, precise strokes (1px-2px) for structures; dashed lines for logic flow"
Diagrammatic Elements: "Floor plan outlines, dimension lines with measurements, isometric staircase, flowchart boxes"
Visual Aids: "Blue fills for active elements, Red dashed arrows for transitions or errors"

Typography:
Heading: "Bold Sans-Serif (Gothic/Helvetica)"
Body Font: "Medium weight Sans-Serif, highly legible"
Label Font: "Condensed Sans-Serif or Monospace for technical specs"
Hierarchy: "Large top-level header, distinct section headers, small annotation text"
Open full pageHow to use it
- 1In the Studio panel, pick slides or infographic and open its prompt box.
- 2Paste the style specification.
- 3Generate, then iterate on the wording if the output drifts.
Square brackets mark the parts you replace with your own topic or question.
- Sci-fi isometric HUD style
The cyberpunk variant from the same set - glowing circuit traces, holographic panels, HUD framing.
Slides, video & infographicsSlides / infographicShared by u/Paolo-Cortez on r/notebooklm
Overall Design Settings:
Tone: "Futuristic, Analytical, Sophisticated, High-Tech, Cinematic"

Visual Identity:
Background Color: "#020814"
Text Color: "#FFFFFF"
Accent Color: "#00F0FF"
Secondary Colors: ["#D600FF", "#0057FF", "#1C2E4A", "#80DEEA", "#1A1A2E"]

Image Style:
Features: "Isometric 3D rendered assets floating on platforms, interconnected by glowing circuit board traces. Holographic projection aesthetics with glass-like panels and digital artifacts."
Texture: "Luminous neon, matte dark metal, translucent glass, smooth digital gradients, clean wireframe edges."
Composition: "Centralized hub-and-spoke layout. A core element anchors the design (center chip), with connection lines leading to peripheral detailed modules. Enclosed in a technical HUD (Heads-Up Display) frame."
Lighting: "Internal luminescence (glow from within), neon backlighting, soft bloom effects, sharp specular highlights on metallic edges, deep high-contrast shadows."
Perspective: "Isometric 3D"
Effects: "Bloom, Lens Flare, Digital Noise"
Structure: "Circuit Board Trace Connectivity"

Typography:
Heading: "Industrial Geometric Sans-Serif (e.g., Eurostile Bold, Orbitron)"
Body Font: "Clean Modern Sans-Serif (e.g., Roboto, Open Sans)"
Case: "Uppercase for Headers, Sentence case for descriptions"
Styling: "High contrast white text against dark backgrounds, occasional accent color highlights"
Open full pageHow to use it
- 1In the Studio panel, pick slides or infographic and open its prompt box.
- 2Paste the style specification.
- 3Generate, then iterate on the wording if the output drifts.
Square brackets mark the parts you replace with your own topic or question.
- Risograph retro-pop style
The playful variant - duotone ink, halftone shading, numbered modular sections.
Slides, video & infographicsSlides / infographicShared by u/Paolo-Cortez on r/notebooklm
Overall Design Settings:
Tone: "Analytic yet playful, structured, conceptual, and instruction-oriented"

Visual Identity:
Background Color: "#F6F3E6"
Text Color: "#00569E"
Accent Color: "#DE2A2A"
Secondary Colors: ["#663399", "#A6D4F2", "#2B2B2B", "#FFFFFF"]

Image Style:
Features: "Duotone ink simulation, misregistration effects, bold iconography, numbered sequences"
Texture: "Coarse paper grain, stippled shading, ink bleed, noise overlap"
Composition: "Modular grid with numbered sections, visual metaphor on left with steps on right"
Lighting: "Flat illustration style with simulated overprinting shadows (multiply blending)"
Shading Technique: "Halftone dots and cross-hatching"
Border Style: "Rough, hand-drawn stroke look with slight offset"
Iconography: "Simplified flat glyphs with texture"

Typography:
Heading: "Heavy Gothic Sans-Serif"
Body Font: "Medium weight Sans-Serif (Legible at small sizes)"
Formatting: "High contrast color-blocking for key phrases"
Character Style: "Blocky, authoritative but approachable"
Open full pageHow to use it
- 1In the Studio panel, pick slides or infographic and open its prompt box.
- 2Paste the style specification.
- 3Generate, then iterate on the wording if the output drifts.
Square brackets mark the parts you replace with your own topic or question.
- Modern newspaper deck
A Japanese business-media art-director persona: Swiss-style asymmetric covers, massive headline typography and strict one-message-per-slide rules.
Slides, video & infographicsSlides / infographicShared by @mmmiyama_D on X, collected in awesome-notebookLM-prompts
You are a top art director leading Japan's "new economy business media." But the language should be what users said in the prompt. so not nessecery in (the language what users requested in the prompt). Based on the following "design definition," generate a visually focused, high-sensibility presentation slide that sparks intellectual excitement in business professionals of the smartphone generation. [Important: Absolutely Prohibited Output Format Rules] * **Complete Exclusion of Markdown Symbols**: Do not include symbols like "#" for headings or "*" and "**" for emphasis in the slide text **under any circumstances**. * **Plain Text Only**: Text displayed on the slide must consist solely of "pure (the language what users requested in the prompt) and English text" without any decorative symbols. [Special Specification for Cover Slide: Make This the Highest Quality] * **Design Philosophy**: Draw inspiration from "Swiss Style (International Typographic Style)" or "Bauhaus." * **Layout**: Ban simplistic "centered alignment." Create tension with **"asymmetrical"** placement. Use a grid system to position the title extremely off to the top left or bottom left, or craft bold negative space for refinement. * **Title Copy Design**: * **Main Title (Ultra-Large · Short Phrase)**: Ditch descriptive words. Make it a visual anchor with a short word or phrase of about "2–5 characters" (e.g., "Liberation," "Collapse and Rebirth," "The True Face of AI"). * **Subtitle (Ultra-Small · Benefit-Driven)**: Carve into the reader's pain points and hint at resolution with a concise sentence (e.g., "Why Is Your Advertising Dead?" "How to Ditch 'Tasks' and Return to 'Creation'"). * **Composition Ratio**: Punch the eyes with the main title, stab the brain with the subtitle. [Overall Design Definition for All Slides] 1. **Core Theme**: Smart & pop business infotainment (intellectual curiosity × entertainment) 2. **Color Palette**: * Background Color: White (#FFFFFF) or Cool Gray (#F5F5F5) * Text Color: Sumi (Jet Black) (#111111) * Accent Color: Electric Yellow (#FFCC00) or Alert Red (#FF3333) 3. **Visual Style**: * Adopt the design philosophy of a "**smartphone-first economic media**." * Use images like "monochrome cutouts of people" or "stylish photos with blown-out backgrounds" to emphasize the subject. * Highlight key numbers or keywords with fluorescent marker-style lines (yellow background) to create rhythm. 4. **Typography (Text as Graphic)**: * Position headlines at an "**ultra-massive size**" occupying **30%–50%** of the slide's area. * **Extreme Jump Ratio**: The size ratio between "headlines" and "body text" must be **10:1** or more. No half-hearted size differences allowed. * For headlines, use **extra-bold sans-serif** (Impact/(Hiragino) W8 weight) to treat them as a "surface," and tuck ultra-thin English fonts into the gaps for a sense of airiness. 5. **Overall Structure**: * Strictly adhere to "1 slide = 1 message." * Layout is a binary choice between "negative space" or "text." Draw the eye through contrasts of text-packed areas that fill the screen and vast empty voids. * Place the conclusion (punchline) with a "bam!" in the center of the slide, or position it spilling off the edge for visual impact.Open full pageHow to use it
- 1In the Studio panel, pick slides or infographic and open its prompt box.
- 2Paste the style specification.
- 3Generate, then iterate on the wording if the output drifts.
Square brackets mark the parts you replace with your own topic or question.
- Sharp-edged minimalism deck
A full YAML spec for an architectural, whitespace-heavy portfolio look, with a catalog of seventeen layout variations to draw from.
Slides, video & infographicsSlides / infographicShared by @yoshifujidesign on X, collected in awesome-notebookLM-prompts
# presentation_design_spec_minimal_jp.yaml # Style: Refined Minimal Portfolio # Characteristics: Top-left navigation, aesthetics of whitespace, grid-based layout Global Design Settings: Tone: "Professional, architectural, sharp-edged minimalism" Color Palette: Base: "#E9E9E9 (light gray) or #FFFFFF (white)" Text: "#000000 (jet black) or #333333 (dark gray)" Accent: "#000000 (black) – used for bold lines and emphasized text" Special: "Dark mode (black background) – used for slides that need emphasis" Typography: Headings: "English sans-serif (e.g., Helvetica Now, Inter). Bold and decoratively positioned." Body: "(the language what users requested in the prompt) Gothic typeface. Small size with generous letter spacing and line height." But the language should be what users said in the prompt. Common Layout Rules: Navigation: "Place a small section number and title such as '01. INTRODUCTION' in the top-left (or top-right) of every slide." Grid: "Use a strict grid system to align elements." Whitespace: "Intentionally leave large areas empty (negative space) to create a sense of luxury." Layout Variations (Catalog): - Type: "Title Typography" Design: "Scattered layout. Randomly place award badges or keywords like stamps. The central title is small, bold, and restrained." - Type: "Text + Data Emphasis" Design: "Asymmetrical split. Narrative text on the left, oversized numbers (black) on the right. Include thin divider lines." - Type: "Card Grid" Design: "Tightly spaced grid. Arrange high-quality images with a web-like interaction feel, such as text appearing on mouse-over." - Type: "Full-Screen Graphic" Design: "Office interior photography occupying the full screen (or more than half). Concrete textures, desks lined with Macs. Reduce saturation for a cool tone. Add a very small caption in the bottom-left." - Type: "Photo + List Split" Design: "50:50 split. Left: architectural or abstract photography. Right: data list (bold headings + light-weight descriptions). Used for company info. Bold item names, thin body text. Generous spacing; avoid overcrowding." But the language should be what users said in the prompt. - Type: "Minimal Map" Design: "Silhouette-style map. Light gray background with a white map. Use ultra-thin callout lines to indicate locations." - Type: "Vertical Timeline" Design: "Vertical axis. A single thin line with text branching left and right. Clean chronological order." - Type: "Bubble Chart / Venn Diagram" Design: "Wireframe style. Black background with thin white line art. Semi-transparent overlapping circles." - Type: "Dialogue (Chat Style)" Design: "Minimal conversational format. Not comic speech bubbles, but simple text blocks with bold speaker names." - Type: "Chronological List" Design: "Rhythmic list. Large years (e.g., 2024) on the left, descriptions on the right. Strong contrast in font sizes." - Type: "Dark Mode Diagram" Design: "Intellectual tech aesthetic. Black background with thin white lines connecting nodes. Constellation- or network-like appearance. Circles connected by fine lines or geometric patterns, expressing a fusion of technology and creativity." - Type: "3-Step Columns" Design: "Typography-driven columns. Large numbers (01, 02, 03) act as pillars. No icons; rely on typographic contrast." - Type: "Logo Grid" Design: "Monochrome grid. Convert all logos to black or gray and align them in a strict grid." - Type: "Two Columns (Problem vs Solution)" Design: "Sharp contrast. A thick black vertical line separates 'Problem' and 'Solution'. Text aligned in block form." - Type: "Centered Layout (Dark Mode)" Design: "Cinematic. A small video thumbnail or key visual centered on a black background. Add an emotional English tagline." - Type: "Formula / Flow Diagram" Design: "Mathematical style. Expressions like 'A × B = C' rendered in large serif type. Minimal arrows." - Type: "Arrow Steps" Design: "Linear process. Place text inside large arrows. High contrast (black arrows with white text)." - Type: "Chart" Design: "Precision data. Graphs with thin lines ending in small black dots. Scientific instrument-like appearance."Open full pageHow to use it
- 1In the Studio panel, pick slides or infographic and open its prompt box.
- 2Paste the style specification.
- 3Generate, then iterate on the wording if the output drifts.
Square brackets mark the parts you replace with your own topic or question.
- Magazine editorial deck
Cutout photos, asymmetric speech bubbles, numbered sections and crop marks — slides that read like a fashion magazine spread.
Slides, video & infographicsSlides / infographicShared by the awesome-notebookLM-prompts collection (CC BY 4.0)
# Instructions Please compile [Source Information] in a [mature-cute, sophisticated magazine-style editorial design]. # Layout Requirements ・Place a large cutout photo of the subject (model woman or product) in the center, emphasizing movement or pose ・Place speech bubbles or text boxes asymmetrically in the left and right margins ・Distribute main points as small sections numbered like "NO.1" "NO.2" ・Place a vertical text box (white background) at the edge of the screen (e.g., right side) and insert a catchy copy ・Place L-shaped lines resembling crop marks ("trim marks") in the four corners to create a poster or page-like feel ・Format: Landscape (4:3 or 3:2), high resolution ・But the language should be what users said in the prompt. # Design Requirements ・Background color: Matte, subdued tone stylish pink (dusty pink or shell pink) ・Main image: Use a photo with the background completely removed (deep etching) ・Decorative elements: Use hand-drawn style speech bubbles, simple circles, and thin straight lines as accents ・Fonts: Headings in sophisticated Gothic or Mincho, comments in hand-drawn style font for a casual feel ・In speech bubbles or text boxes, write key points from the source information in emotional handwritten text of a young woman ・Color palette: Matte pink for background, charcoal gray or black for text, white for accents ・Overall atmosphere: Mature-cute, feminine, trendy, polished tone # Expressions to Avoid ・Overly childish vivid colors, overly flashy gradients, heavy shadowsOpen full pageHow to use it
- 1In the Studio panel, pick slides or infographic and open its prompt box.
- 2Paste the style specification.
- 3Generate, then iterate on the wording if the output drifts.
Square brackets mark the parts you replace with your own topic or question.
- Yellow × black fashion deck
One sentence, big effect: a bold fashion-magazine look with serif display type and sticker-style accents.
Slides, video & infographicsSlides / infographicShared by the awesome-notebookLM-prompts collection (CC BY 4.0)
Yellow background, black text, large dynamic modern serif font placement, stylish, photos are unique fashion photography, with pop and chic touches like handwriting or stickers scattered throughout, bold layout like a fashion magazine
Open full pageHow to use it
- 1In the Studio panel, pick slides or infographic and open its prompt box.
- 2Paste the style specification.
- 3Generate, then iterate on the wording if the output drifts.
Square brackets mark the parts you replace with your own topic or question.
- Seminar minimal-text deck
The shortest spec in the collection — for decks you talk over rather than read.
Slides, video & infographicsSlides / infographicShared by the awesome-notebookLM-prompts collection (CC BY 4.0)
White background, black text, red accent color, sans-serif font, high-quality photo like a fashion portrait, dynamic typography, high-sensibility design
Open full pageHow to use it
- 1In the Studio panel, pick slides or infographic and open its prompt box.
- 2Paste the style specification.
- 3Generate, then iterate on the wording if the output drifts.
Square brackets mark the parts you replace with your own topic or question.
- Studio mockup premium deck
A product-studio aesthetic: device mockups, soft shadows and premium spacing for launch or portfolio decks.
Slides, video & infographicsSlides / infographic - Tech-art neon deck
Constructivism meets tech: draft-line grids, neon-yellow geometry and Didot/Helvetica pairings on paper-textured gray.
Slides, video & infographicsSlides / infographicShared by the awesome-notebookLM-prompts collection (CC BY 4.0)
# presentation_design_spec_neon_collage_jp.yaml # Source: Uploaded Image (1bce448a...jpg) # Style: Constructivism / Tech-Art / Avant-Garde # Concept: "Architecture of Intelligence" Global Design Settings: Tone: "Avant-garde, structural, intellectual, artistic, future-oriented" Visual Identity: Background Color: "Warm gray / beige (#E0E0D0) — matte, paper-like texture" Text Color: "Charcoal gray (#333333) — not pure black" Accent Color: "Neon Yellow (#DFFF00) — used for geometric shapes" Line Color: "Ultra-thin gray lines (0.5pt), similar to architectural draft lines" Typography: Headings: "Mix of serif (Didot, Bodoni) and sans serif (Helvetica)" Body: "Small-size text aligned strictly to the grid" Numbers: "Typewriter-style fonts (Courier New)" Slide Composition Patterns: # --- Cover / Concept --- Section: "Cover / Concept" Layout Type: "Triple Collage" Design Details: - "Structure: Screen divided into three sections with grid lines" - "Visuals: Monochrome cut-out portraits" - "Accents: Neon yellow circles and squares behind or in front of the subject" - "Decoration: Concentric rings (target-scope style) placed around the focal point" # --- Analysis / Diagram --- Section: "Analysis / Dissection" Layout Type: "Technical Drawing" Design Details: - "Background: Fine grid similar to graph paper" - "Main: Line-art / wireframe illustrations of products or concepts, partially filled in neon yellow" - "Annotations: Thin leader lines with blueprint-style labels (e.g., Fig.1, Fig.2)" # --- Process / Flow --- Section: "Process / Flow" Layout Type: "Geometric Connection" Design Details: - "Elements: Neon yellow circles, squares, triangles" - "Connections: Dotted or dashed lines linking shapes to express logic flow" - "Photography: Use shapes as masks to embed monochrome photos inside them" # --- Data / Infographic --- Section: "Data / Infographic" Layout Type: "Radar Chart Art" Design Details: - "Chart: Large spiderweb-style radar chart across the slide" - "Data Lines: Thick neon yellow plotting lines" - "Background: Subtle texture resembling old maps or blueprints" Design Rules: - "Color Limitation: Use only three main colors — beige (background), monochrome (photos), neon yellow (geometry)" - "Collage: Never place photos as plain rectangles; always cut out the subject cleanly" - "Layering Order: Grid background → neon geometric shapes → monochrome cut-out photo → foreground text"Open full pageHow to use it
- 1In the Studio panel, pick slides or infographic and open its prompt box.
- 2Paste the style specification.
- 3Generate, then iterate on the wording if the output drifts.
Square brackets mark the parts you replace with your own topic or question.
- Sports energy deck
Asphalt black, bolt lime and jersey numerals — a high-tempo spec for anything competitive or fast-moving.
Slides, video & infographicsSlides / infographicShared by the awesome-notebookLM-prompts collection (CC BY 4.0)
# presentation_design_spec_sports_active_jp.yaml # Style: Sports / Athletic / Energy # Concept: "Speed, Impact, and Heartbeat" Global Design Settings: Tone: "Passionate, fast-paced, powerful, competitive" Color Palette: Base: "#111111 (asphalt-like black)" Text: "#FFFFFF (white)" Accent: - "#CCFF00 (Bolt Lime)" - "#FF4500 (Neon Orange)" Gradient: "Overlay a black-to-transparent gradient on top of photos" Typography: Headings: "Extra-bold italic gothic type (Impact, Din Condensed, etc.)" Body: "Italic sans serif type" Numbers: "Stencil-style or jersey-style sports typography" Common Layout Rules: Navigation: "Place page numbers inside angled, diagonal-cut shapes" Shapes: "Skew rectangles or images, or use parallelogram shapes" Layout Variations: - Type: "Action Cut" Design: "Use dynamic background photography (motion blur, running shots). Place large italic text in the foreground, overlapping the athlete or subject." - Type: "VS Layout" Design: "Divide the screen diagonally. Bottom-left = your side (strengths). Top-right = competitor (challenges). Use a jagged lightning-like divider." - Type: "Speed Meter" Design: "Display achievements or metrics in the style of a car speedometer or stadium scoreboard." - Type: "Highlight Stripe" Design: "Place a bold diagonal stripe behind key words, as if marked with a fast, energetic brush or marker."Open full pageHow to use it
- 1In the Studio panel, pick slides or infographic and open its prompt box.
- 2Paste the style specification.
- 3Generate, then iterate on the wording if the output drifts.
Square brackets mark the parts you replace with your own topic or question.
- Executive summary for a busy reader
A no-filler, decision-grade summary aimed at someone who has five minutes.
Writing & contentChatShared by Sourclip
Write a one-page executive summary aimed at a senior decision-maker who has five minutes.

Structure:
- Lead with the single most important takeaway in one sentence.
- "3 things you need to know" — three tight bullets.
- "3 implications for action" — what this changes in practice.
- "2 risks worth flagging" — where this could go wrong.

No preamble. No "this report covers". No throat-clearing. Every line should earn its place.
Open full pageHow to use it
- 1Open your notebook at notebooklm.google.com.
- 2Replace the [bracketed] parts with your specifics.
- 3Paste the prompt into the chat box and send it.
Square brackets mark the parts you replace with your own topic or question.
- Long-form article outline from sources
A publishable outline you can hand to a writer — thesis, sections, quotes, and a CTA.
Writing & contentChatShared by Sourclip
Draft a long-form article outline that synthesizes this notebook.

Produce:
- Three working title options (one direct, one provocative, one curiosity-driven).
- A 2–3 sentence hook for the intro.
- The central thesis in one sentence.
- 5–7 H2 sections, each with 2–3 H3 sub-points.
- For each H2, the single strongest quote or statistic from the notebook to anchor it (include source).
- A closing call-to-action paragraph.

The argument must be defensible using only the uploaded sources.
Open full pageHow to use it
- 1Open your notebook at notebooklm.google.com.
- 2Replace the [bracketed] parts with your specifics.
- 3Paste the prompt into the chat box and send it.
Square brackets mark the parts you replace with your own topic or question.
- Repurpose into a multi-platform content matrix
Turn one notebook into a full week of content — newsletter, LinkedIn, X threads, short-form scripts, and quote cards.
Writing & contentChatShared by Sourclip
Treat this notebook as the source material for a full week of multi-platform content.

For each of the following formats, produce ready-to-edit drafts grounded in the sources:

1. Newsletter — one issue (450–600 words). Strong hook, 3 sections, a sign-off CTA. Pull one quote from the notebook per section and cite the source.
2. LinkedIn posts — 3 posts. Each is one strong hook + a short story + one practical takeaway + a discussion prompt. 150–220 words each.
3. X/Twitter threads — 2 threads, 7–10 tweets each. The first tweet must be a hook that earns the click. The last tweet must contain the most valuable single line in the thread.
4. Short-form video scripts — 3 scripts, 45–60 seconds each. Structure as Hook (5s) → Setup (10s) → Payoff (25s) → CTA (5s).
5. Quote cards — 5 standalone, screenshot-worthy lines pulled or distilled from the sources, each under 25 words.

Make every angle distinct — no two outputs should make the same point.
Open full pageHow to use it
- 1Open your notebook at notebooklm.google.com.
- 2Replace the [bracketed] parts with your specifics.
- 3Paste the prompt into the chat box and send it.
Square brackets mark the parts you replace with your own topic or question.
- YouTube transcripts to content ideas
Mine video transcripts for hooks, angles, threads, and quotable lines worth repurposing.
Writing & contentChatShared by Sourclip
Treat the YouTube transcripts in this notebook as raw material for new content.

Pull out:
1. 10 punchy hook lines worth opening a video, thread, or post with.
2. 5 contrarian or under-discussed angles I could build a piece around.
3. 5 "how-to" breakdowns I could expand into standalone tutorials.
4. 3 thread or carousel outlines (give me a working title + 5–7 beats each).
5. Any vivid stories, metaphors, or one-liners worth quoting verbatim.

Cite which video (and roughly which timestamp range) each item came from.
Open full pageHow to use it
- 1Open your notebook at notebooklm.google.com.
- 2Replace the [bracketed] parts with your specifics.
- 3Paste the prompt into the chat box and send it.
Square brackets mark the parts you replace with your own topic or question.
- Turn sources into a strategic memo
A founder-grade internal memo: situation, options, recommendation — every line backed by your notebook.
Strategy & decisionsChatShared by Sourclip
Write a strategic memo for a small leadership team using only this notebook.

Use this exact structure:

1. Situation — 3–5 sentences on what's actually going on, drawn from the strongest signals in the sources.
2. Why now — the 2–3 forces in the notebook making this urgent rather than something to revisit next quarter.
3. Options — 3 distinct paths forward. For each: a one-line description, the strongest source supporting it, the trade-off it accepts, and the type of team best suited to it.
4. Recommendation — pick one. Defend it in 4–6 sentences using specific sources.
5. What would change my mind — 3 concrete future signals that would invalidate the recommendation.
6. Open questions for the team — 3 questions worth debating before locking in.

Write it terse and confident. No throat-clearing. No "this memo covers." If a section can't be supported by the notebook, write "Not supported by current sources" rather than fabricating.
Open full pageHow to use it
- 1Open your notebook at notebooklm.google.com.
- 2Replace the [bracketed] parts with your specifics.
- 3Paste the prompt into the chat box and send it.
Square brackets mark the parts you replace with your own topic or question.
- Build a decision framework from sources
Convert raw research into a weighted scoring matrix you can actually act on.
Strategy & decisionsChatShared by Sourclip
Build a structured decision framework using the sources in this notebook.

Assume I have to choose between [INSERT OPTIONS HERE — e.g., "Option A vs Option B vs Option C"].

Produce:
1. The 5–7 criteria that actually matter for this decision, drawn from the sources. For each, explain why it matters and which source(s) elevate it.
2. A weight (1–5) for each criterion, with a one-sentence justification grounded in the notebook.
3. A scoring table: rows are options, columns are criteria, cells are 1–5 scores with a one-line citation from the sources for each score.
4. The dominant option after weighted scoring, and the one criterion that — if reweighted — would flip the result.
5. The two questions I still need answers to before committing, and which kind of source would most likely contain them.

If the notebook doesn't support a confident score, write "Insufficient evidence" rather than guessing.
Open full pageHow to use it
- 1Open your notebook at notebooklm.google.com.
- 2Replace the [bracketed] parts with your specifics.
- 3Paste the prompt into the chat box and send it.
Square brackets mark the parts you replace with your own topic or question.
- Steelman the opposing views
Build the strongest possible version of each side in the notebook — then judge the debate on merit.
Strategy & decisionsChatShared by Sourclip
Stage a steelman debate between the opposing viewpoints in this notebook.

Step 1 — Identify the 2–3 main viewpoints the sources represent. Name each one.

Step 2 — For each viewpoint, write its steelman:
- Strongest core argument in 2–3 sentences.
- The 3 best pieces of evidence from the notebook supporting it.
- The most charitable interpretation of its weakest point.

Step 3 — Cross-examination. For each pair of viewpoints, list the 2 sharpest questions one side would ask the other, and the strongest reply available in the sources.

Step 4 — Verdict. Which view holds up best given only the notebook evidence? Explain in 3–5 sentences what would have to change for a different view to win.

No straw men. If a viewpoint's evidence is thin, say so explicitly — don't fabricate support.
Open full pageHow to use it
- 1Open your notebook at notebooklm.google.com.
- 2Replace the [bracketed] parts with your specifics.
- 3Paste the prompt into the chat box and send it.
Square brackets mark the parts you replace with your own topic or question.
- Competitor research brief
A clean teardown of every competitor mentioned in the notebook — positioning, pricing, gaps.
Strategy & decisionsChatShared by Sourclip
Build a competitor research brief from these sources.

For each competitor named in the notebook, capture:
- Positioning statement, in their own words where possible.
- Target customer (be specific: role, company size, use case).
- Pricing model and any published prices.
- The 3 features they emphasize most in their messaging.
- Their stated weaknesses, admitted gaps, or roadmap items.
- Recurring customer complaints surfaced in the sources.

End with a one-page "where we can differentiate" summary listing the 3–5 most defensible wedges.
Open full pageHow to use it
- 1Open your notebook at notebooklm.google.com.
- 2Replace the [bracketed] parts with your specifics.
- 3Paste the prompt into the chat box and send it.
Square brackets mark the parts you replace with your own topic or question.
- Project three plausible future scenarios
Build optimistic, base-case, and pessimistic 24-month scenarios from the notebook — each with leading indicators and a probability weight.
Strategy & decisionsChatShared by Sourclip
Use only the evidence in this notebook to project three future scenarios over the next 24 months.

For each of Optimistic, Base Case, and Pessimistic, produce:
1. Headline outcome in one sentence.
2. The 3 key drivers (each with the source that supports it) that would push the world toward this scenario.
3. The strongest piece of counter-evidence in the notebook that argues against this scenario.
4. Three leading indicators — concrete, observable signals over the next 6 months that would tell you this scenario is unfolding.
5. The first decision someone reading this should make differently if they believed this scenario.

End with:
- A probability you'd assign each scenario, summing to 100%, with a one-sentence justification grounded in the sources.
- The single signal that, if observed, would most strongly shift weight between scenarios.

Do not invent drivers or indicators the notebook can't support. Speculation is fine; fabrication is not.
Open full pageHow to use it
- 1Open your notebook at notebooklm.google.com.
- 2Replace the [bracketed] parts with your specifics.
- 3Paste the prompt into the chat box and send it.
Square brackets mark the parts you replace with your own topic or question.
- Turn research into an implementation roadmap
A dependency-mapped roadmap for a team — milestones, critical path, owner archetypes, risks, and kill criteria.
Strategy & decisionsChatShared by Sourclip
Convert this notebook into an implementation roadmap for a small team that has to actually ship the thing the sources describe.

Produce:
1. End-state in one sentence — what "done" looks like, grounded in the sources.
2. Milestones — 4–6 named milestones in execution order. For each: the outcome, the sources that justify it, and the single thing that proves the milestone is real.
3. Dependencies — for each milestone, list what must be true before it can start. Highlight the critical path explicitly.
4. Workstreams and owner archetypes — 3–5 parallel workstreams with the kind of person who should run each (e.g. "infra-leaning engineer", "design-partner manager"). Don't invent names.
5. Risks and kill criteria — the 3 risks most likely to derail the roadmap, and the observable signal that should trigger a stop or pivot for each.
6. The smallest possible week-1 commit — one concrete action that could begin tomorrow and would still produce useful information even if the whole roadmap is later scrapped.
Open full pageHow to use it
- 1Open your notebook at notebooklm.google.com.
- 2Replace the [bracketed] parts with your specifics.
- 3Paste the prompt into the chat box and send it.
Square brackets mark the parts you replace with your own topic or question.
- Turn research into a 30-day action plan
Turns a notebook into a week-by-week plan with concrete milestones instead of a list of takeaways. For operators and founders moving from research to execution.
Strategy & decisionsChatShared by Sourclip
Convert this notebook into a 30-day action plan for someone applying what they just learned.

Structure exactly as:

Goal — In one sentence, the single most important outcome the sources suggest aiming for over the next 30 days.

Week 1 — Foundation.
3 actions. For each: what to do (one verb-led line), why (cite the source that supports it), and the smallest credible "done" condition.

Week 2 — Build.
3 actions, same format. These should compound on Week 1.

Week 3 — Pressure-test.
3 actions, same format. These should expose whether the plan is working.

Week 4 — Decide.
2 actions, same format, plus one explicit decision point: "If X by end of week 4, do Y; otherwise Z." Both branches must be grounded in the notebook.

Constraints:
- No action longer than one sentence.
- Every action must cite a source.
- If two actions overlap, merge them. Twelve actions max across the whole plan.
- If the notebook can't support a week, write "Not enough evidence for Week N — here's what to research first" instead of fabricating tasks.
Open full pageHow to use it
- 1Open your notebook at notebooklm.google.com.
- 2Replace the [bracketed] parts with your specifics.
- 3Paste the prompt into the chat box and send it.
Square brackets mark the parts you replace with your own topic or question.
- Triage your sources before you synthesise
Step one of any multi-source project. Run this before asking for a synthesis and it tells you which sources actually earn their place, which duplicate each other, and where the collection has a hole. Ten good sources beat fifty mediocre ones, and this is how you find out which ten you have.
WorkflowsChatAct as a research librarian assessing this collection before I synthesise it. For each selected source, give me one row: - Title - What it uniquely contributes that no other source here does - Quality signal: primary evidence / secondary reporting / opinion / promotional - Keep, merge with [which source], or drop — and one line of why Then, separately: 1. Which sources substantially duplicate each other? 2. What question would I want to answer from this collection that nothing here covers? 3. If I could add exactly two sources, what should they be? Judge only what is in the sources. If you cannot tell what kind of source something is, say so rather than guessing.
Open full pageHow to use it
- 1Open your notebook at notebooklm.google.com.
- 2Replace the [bracketed] parts with your specifics.
- 3Paste the prompt into the chat box and send it.
Square brackets mark the parts you replace with your own topic or question.
- Multi-source synthesis into a Video Overview
A three-stage pipeline: synthesise everything in chat, save that answer as a note, then generate the video from the note alone. Generating straight from twenty sources gives you a wandering video; generating from one tight synthesis gives you a focused one, because the model is no longer choosing what matters while it narrates.
WorkflowsChatShared by Guillaume Martin
Produce a structured synthesis of all selected sources that will be used as the single source for a video overview.

Structure it exactly like this:
1. The core claim — one paragraph a newcomer could repeat accurately
2. The three to five points that carry that claim, each with what supports it
3. Where the sources disagree, and what the disagreement turns on
4. What none of the sources establish, stated plainly as open questions
5. One concrete takeaway for someone who has to act on this

Rules:
- Cite as you go; every claim traces to a source
- Prefer specifics — numbers, names, dates — over summary language
- If a point rests on a single source, say so
- No preamble and no closing summary; start at heading 1
Open full pageHow to use it
- 1Open your notebook at notebooklm.google.com.
- 2Replace the [bracketed] parts with your specifics.
- 3Paste the prompt into the chat box and send it.
Square brackets mark the parts you replace with your own topic or question.
- The prompt improvement cycle
For prompts you will run more than once. Instead of tweaking wording and hoping, this makes the notebook grade its own last answer against the sources, then rewrite the prompt that produced it. Three passes usually gets further than an afternoon of manual fiddling.
WorkflowsChatShared by Guillaume Martin
Act as a prompt engineer reviewing your own previous answer.

Step 1 — Grade it. Mark each claim in your last answer as: supported by the sources, inferred beyond them, or unsupported. Give the counts.

Step 2 — Diagnose the prompt, not the answer. Which instruction in my prompt allowed the weak parts through? Be specific about the wording at fault: vagueness, a missing constraint, or an assumption I left implicit.

Step 3 — Rewrite my prompt so those failures are impossible rather than discouraged. Keep it as short as the job allows.

Step 4 — Name the one thing your rewritten prompt still cannot guarantee, so I know what to check by hand.
Open full pageHow to use it
- 1Open your notebook at notebooklm.google.com.
- 2Replace the [bracketed] parts with your specifics.
- 3Paste the prompt into the chat box and send it.
Square brackets mark the parts you replace with your own topic or question.
- From notebook to a finished deliverable
The last mile: you have read everything and now something has to leave the notebook. This asks for the deliverable and its evidence trail in one pass, so the draft arrives with the citations already attached instead of you rebuilding them afterwards.
WorkflowsChatI need to produce [a brief / a deck / a memo / a study guide] for [audience] who will use it to [decision or task]. Work in this order and label each part: PART 1 — Outline. The sections this deliverable needs for that audience and that decision, no more. Say which section carries the weight. PART 2 — Draft. Write it. Match the register to the audience, not to the sources. Cite as you go. PART 3 — Evidence table. One row per load-bearing claim: the claim, the source, and whether the source states it directly or I am inferring it. PART 4 — What would change this. The findings that, if wrong, would change the recommendation — so I know what to verify before sending.
Open full pageHow to use it
- 1Open your notebook at notebooklm.google.com.
- 2Replace the [bracketed] parts with your specifics.
- 3Paste the prompt into the chat box and send it.
Square brackets mark the parts you replace with your own topic or question.
Square brackets mark the parts you replace. Every prompt links back to the thread or roundup where its author shared it. Found a better one? Submit it.
NotebookLM prompts, answered
What are NotebookLM prompts?
NotebookLM prompts are pre-written instructions you paste into Gemini Notebook's (formerly NotebookLM) chat, its Customize settings, or the Audio Overview and Slides tools, to get a specific kind of output — a structured research brief, a stress-test of an argument, a set of exam flashcards — instead of a generic "summarize this" answer.
How do I use a NotebookLM prompt?
Open your notebook at notebooklm.google.com, replace any [bracketed] placeholder with your own topic, then paste the prompt where it says it goes: the chat box, the notebook's Customize settings, or the Audio Overview / Slides prompt box.
Are these NotebookLM prompts free?
Yes. Every prompt on this page is free to copy, credited to whoever originally shared it, and there's no sign-up or paywall.
What's the difference between a chat prompt and a Customize prompt?
A chat prompt is a one-off message sent in the conversation. A Customize prompt is saved as the notebook's persistent instructions, so it shapes every answer from that notebook afterward, not just one reply.
Do these prompts still work now that NotebookLM is called Gemini Notebook?
Yes — Gemini Notebook is simply the renamed NotebookLM. Sources, chat and Studio all work exactly the same, so every prompt here still works as written.